One of the worst transitions that an Italian pasta lover has to endure when going gluten free is saying goodbye to beautiful baked ziti, creamy, white veggie lasagna, and ricotta filled ravioli or tortellini. Early on in my gluten free diet, I experimented with all of the gluten free brands of pasta that were available at the time, the best that I had found was Tinkyada brown rice pasta which maintained its texture well while cooking. A common problem with gluten free pasta is its ability to turn mushy, as without the gluten, there isn’t a good binder to hold everything together. Tinkyada pasta both in its taste and texture was as close to non-gluten free pasta as I could remember, however cooking it was slightly complicated and could produce a mushy product with only an extra minute of cooking. Another downside, as is the case with many gluten free products, is the cost of gluten free pasta is much higher than that of regular pasta. Tinkyada pasta for instance, depending on shape, can run about $3.99 for a 12 oz bag while a mainstream brand like Barilla charges $1.00 for 16 oz of the same type of pasta.
For the past couple of years and while pregnant I persevered and made do with the gluten free pasta available but unfortunately never grew very fond of the products that were available nor the amount of money that I was spending on them. Wonderfully though, in the past few months mainstream pasta brands have thrown their hats into the gluten free ring and have produced fantastic products. Brands such as Ronzoni and Barilla have provided gluten free options that are not only more enjoyable to eat but are much more economical. For most of my pasta cooking, I now use one or the other mainstream brand and get rave reviews from my family. On the occasion though when lasagna is on the menu, Tinkyada is my go to brand for these noodles as they don’t yet exist elsewhere but hopefully will soon (fingers crossed).
One dish that I fell in love with while pregnant that was so versatile that it embraced the original gluten free noodles at the time and has since now married so well with the Barilla and Ronzoni options is my mother-in-law’s baked macaroni and cheese. I first had the joy of tasting her macaroni and cheese prior to going gluten free and fell in love with the perfect ratio of cheese sauce to pasta as well as the breadcrumb topping that was the metaphoric icing on the cake. Soon after my first tasting I had converted to a gluten free diet and feared that I had my first and last encounter with the delectable dish. However, my mother-in-law, being the kind and accommodating soul that she is put together a gluten free version and made her daughter-in-law’s sensitive tummy very happy. So I’m sharing today with you a converted version of my mother-in-law’s baked macaroni and cheese that brings a smile to not only my face but also my husband and little one’s faces as well. Thank you Grammy!
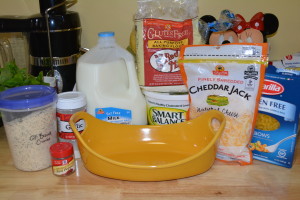
Ingredients:
- 2 cups skim milk
- 2 tablespoons butter (I use Smart Balance which is marked gluten free)
- 2 tablespoons all purpose flour (I use Bob’s Red Mill)
- 1/4 tsp garlic salt
- 1/8 tsp red cayenne pepper
- 12 oz finely shredded cheddar jack cheese
- 1 lb elbow macaroni (I use either Ronzoni or Barilla, any shape will do)
- Breadcrumbs to sprinkle on top
- Remember as always to check all labels and call necessary companies to verify gluten content if in question as labels do change frequently and can do so between purchases.
Directions:
- Preheat oven to 375 degrees.
- Cook pasta in salted water for about 3/4 of the directed cook time.
- While pasta is cooking, melt butter in saucepan over low heat.
- Whisk flour and garlic salt into melted butter making a thick roux.
- Heat mixture over low heat until it becomes smooth and bubbly.
- Keep mixture at low heat and stir in milk and cayenne pepper.
- Stirring frequently, bring mixture to a boil.
- Remove from heat and add in cheese.
- Stir cheese sauce at low heat until cheese has melted and sauce is smooth.
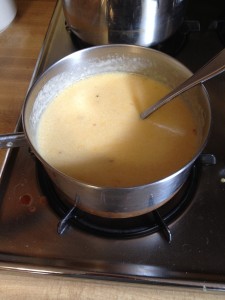
- Add sauce to baking dish, then layer cooked pasta, and repeat
- Once all pasta and sauce are used, dot top of macaroni with butter.
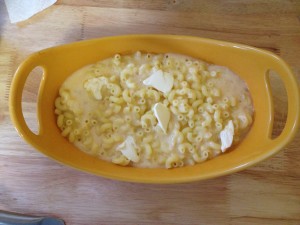
- Bake at 375 degrees for about 20 minutes.
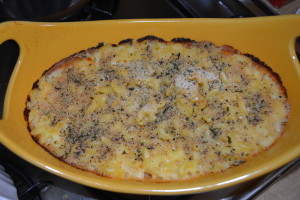
- Dust breadcrumbs (and a little garlic salt if you’d like) over top of macaroni and bake for an additional 10 minutes.
- Remove from oven, cool for 5 minutes, and then enjoy!
Although my husband and daughter enjoy the gluten free version I usually prepare a gluten free and non-gluten free version. Typically I cook about 6 oz of gluten free pasta and 10 oz of the non-gluten free pasta in separate pots. I make one serving of the cheese sauce made with the gluten free flour and divide it proportionally between the two dishes just as I directed above. Just as I top the gluten free macaroni with the gluten free breadcrumbs I do the same with the non-gluten free equivalent with regular Italian breadcrumbs. When making both forms of any dish though you have to be careful with cross contamination, i.e. using the same spoon to mix the pasta, etc. I prefer to split the recipe making gluten free for myself and regular for my husband and daughter for a number of reasons, mainly because they do not require a gluten free diet and it’s healthy for them to keep gluten as part of their normal diet but also it is more economical to make a portion with regular pasta which is much cheaper.
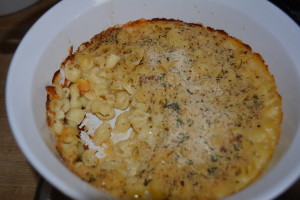
This recipe is truly a family favorite and is made in our house at least once every other week (trust me, we would eat it more often but try to limit our pasta consumption). It was by far one of my favorite dishes while pregnant and thankfully I never lost a taste for macaroni and cheese like I had with many other dishes. Pregnant or not, give it a try and I promise you won’t even miss the gluten!
Enjoy!
Sincerely,
Lindsay
Jo-Lynne Shane {Musings of a Housewife}
March 29, 2014 at 9:55 pm (11 years ago)That sounds SO good right now!!
Lindsay
March 29, 2014 at 10:41 pm (11 years ago)We love this one! Definitely have this once every other week at least and the best part…leftovers are great the next day too (when we have some left that is)!