It’s A Busy Time Of Year With The Holidays And Birthdays, Birthdays, Birthdays, Including A Very Special Little Girl!

Welcome back from your Thanksgiving holiday! 

I hope everyone had a wonderful holiday with family and friends, I know we certainly did. My husband was able to extend his holiday break this year so we got to enjoy even more days together pre-holiday which were such a nice treat. With hubby home with our little one and myself, I decided to unplug for the holiday and share an uninterrupted break with my little family. Our week was filled with some wonderful adventures that our little girl this year seemed to just love, well at least some of them anyway, from enjoying the holiday spirit with a road trip to Hershey Park for Christmas in Candylane, visiting Santa for the 2nd time not quite loving it, and topping off the week with decorating one of our trees (we’ve decided to add a real tree in a few weeks to our tradition this year too, should be interesting with an inquisitive dog and toddler!). 

November into December is always a crazy busy time for us, not only thanks to the holiday duo and all of the festivities that go along with them but also because we have a ton of birthdays to celebrate. Last month it seemed there was always a birthday around the corner and this month is just the same but a bit more personal to us since it includes our special little girl who’s turning 2!!!! Her actual birthday falls right before Christmas so to separate the two we like to have her birthday party at the beginning of December, and as a family of three plus one furry friend we celebrate her real birthday in a special way with a few special presents too on her actual birthday. So with the first full weekend of December coming up this week, I’m in full birthday mode, getting ready for our little one’s Snow White birthday party. All of this prepping just reminds me of just one year ago when we were ringing in her first birthday, and what a birthday it was.

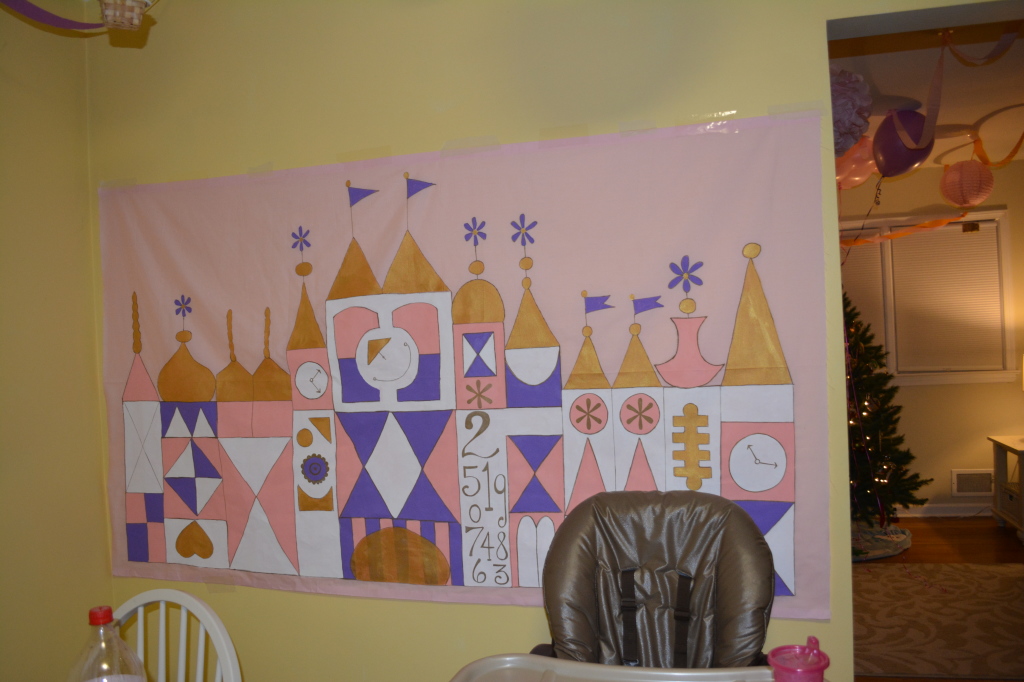
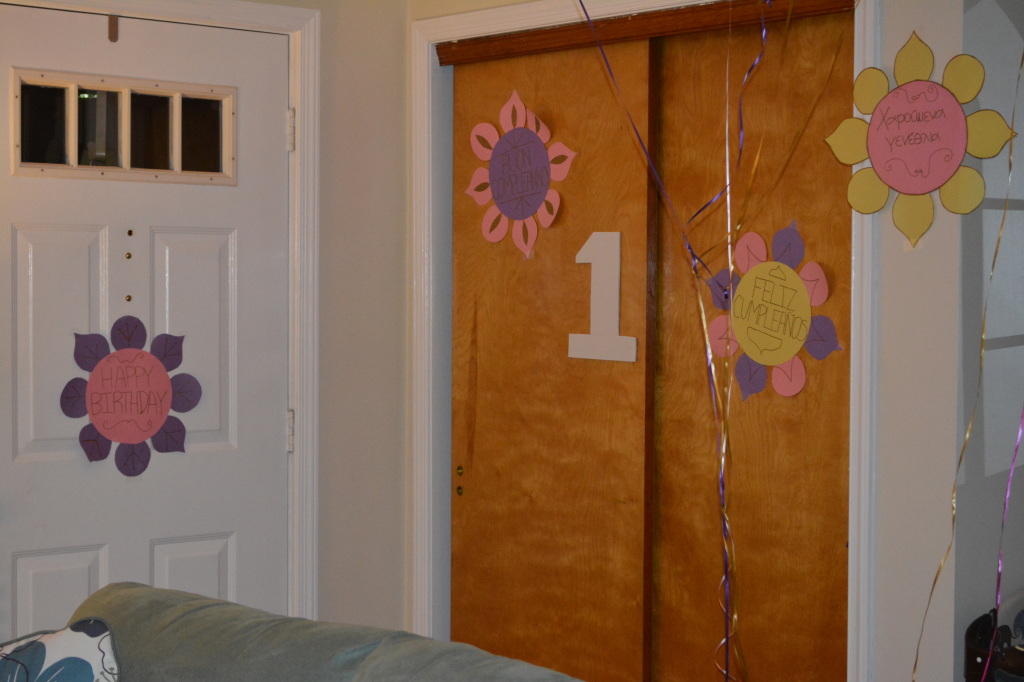
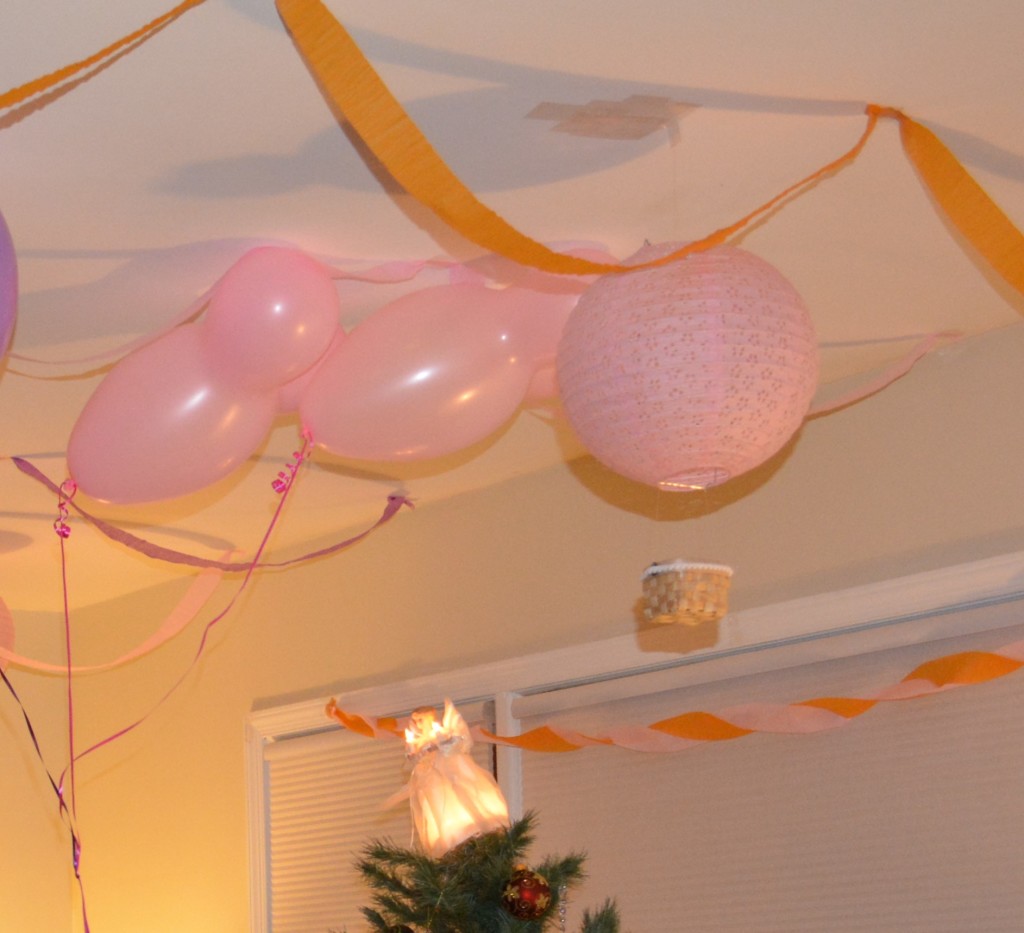
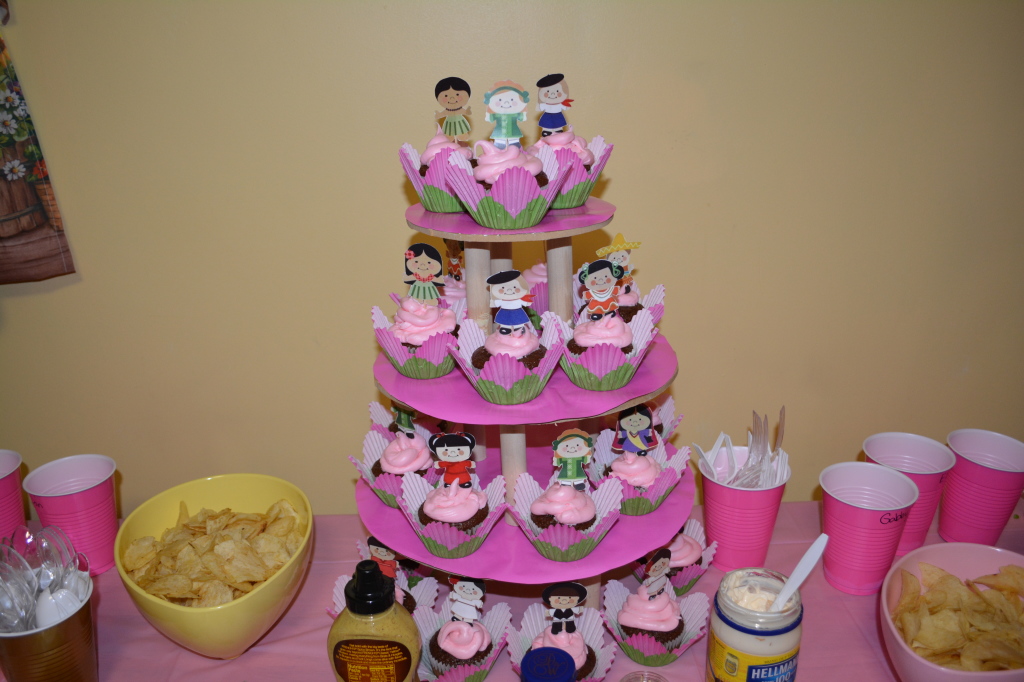
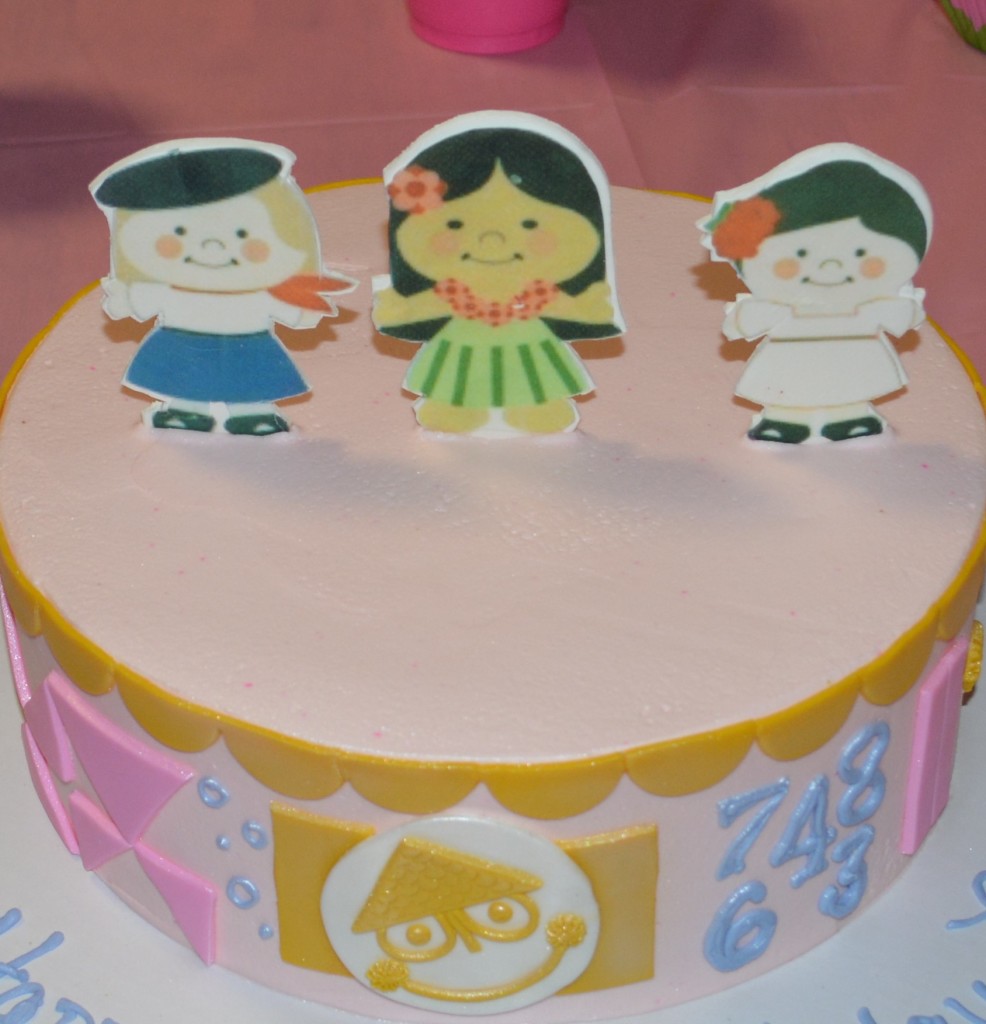
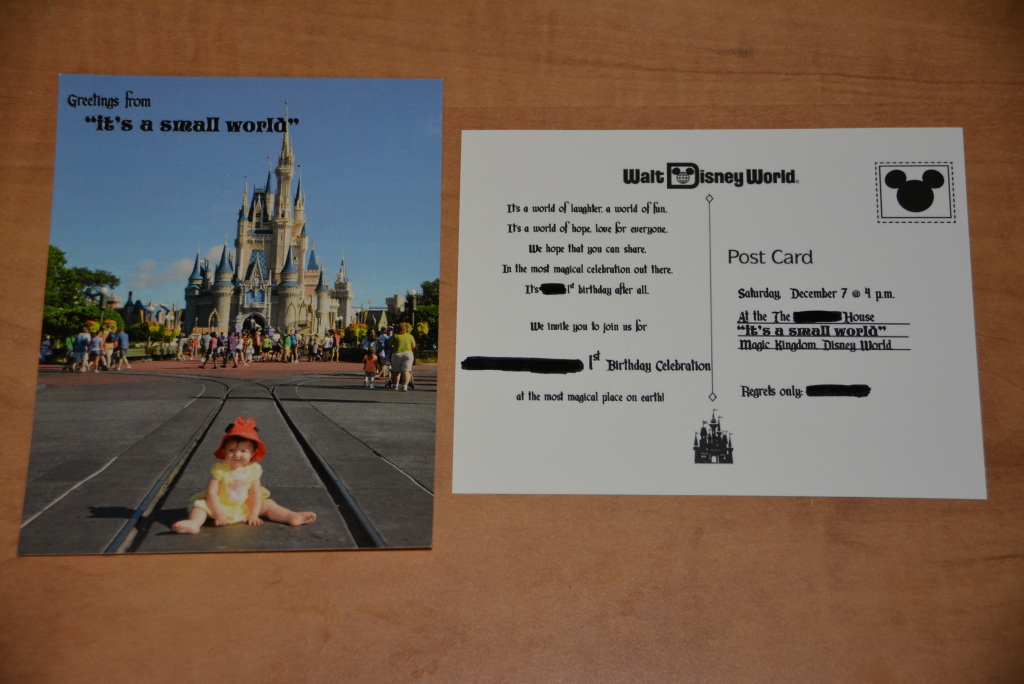
Around the same time last year, we were in full party mode getting everything ready for our little girl to turn the big 1. We thought long and hard about the perfect theme for her party and in the end decided on one that our little Disney baby really loved. Since we were fresh off of our first family vacation to Disney World we designated her first birthday party as an “it’s a small world” party, in honor of her first and favorite ride in Disney. Her party was equipped with a perfect personalized Disney postcard invitation made by yours truly, DSC_0633     a gorgeous hand painted backdrop of the ride, made by her Aunt, DSC_0893 handmade signs saying Happy Birthday in a couple different languages (remind you of the end of the ride?), DSC_0889 some special hot air balloon lanterns and pink Mickey balloons put together by Mommy, DSC_0887 (2) streamers and handmade puffs in all shades of pink, purple, and gold, DSC_0895 lots of delicious eats and treats like my small world people cupcakes and Mickey shaped marshmallow treats (gluten free too!), DSC_0667 and a very special first birthday cake made by Classic Cake (not gluten free, but just right for our little one). DSC_0700 (2)

Our little one’s it’s a small world birthday was filled with so much love and Mommy and Daddy couldn’t have been happier to create that special memory for her. It definitely was an extra special first birthday party that reflected how special our first year with our little girl was. In fact, as a little bonus for our guests and a surprise for my husband, I made a slideshow of some of our favorite photos from that year, bringing tears to many an eye in the room.

Looking back on her first birthday party reminded me of all of the fun and excitement that I had putting it together. So for her 2nd birthday I definitely wanted to give her just as special a memory as last year but now one that she’ll enjoy even more. Picking what character or theme was both easy and tough, easy in the sense that our little girl is a Disney darling through and through so anything Disney would make her happy, hence the tough part. So we left the decision up to her and let her choose between a couple ideas and the winner was Snow White, her favorite Disney movie to date. The choice was extra special, seeing as I’ve always said since she was born that she was my little Snow White, with her dark hair and lighter complexion, and ever since she’s worn many a Snow White outfit. So Snow White it is for her 2nd birthday!

I’ve been working on some special touches here and there since we picked out the final plan and even though I have lots to do yet, I couldn’t be more excited for her big day in only a few short days. I’m so excited to create a spectacularly magical birthday for our growing toddler who seems to be following in her Disney loving parents footsteps. You’ll have to stay tuned for a full birthday recap after the party but for now here’s a sneak peak at my big plans.

Dress and Decorations:

  • A personalized, magic mirror inspired invitation
  • An extra special, handmade Snow White dress from Etsy
  • Apple garland
  • Red apple plates
  • Some woodsy accents here and there 
  • Red balloons as well as a giant gold 2 balloon that’ll probably be as big as little one herself

On The Menu:

  • A custom cake just for little one from Classic Cake
  • Red apple cupcakes made by Mommy
  • Apple shaped cookies
  • Jewel candies
  • Magical kiss cookies
  • Apple, marshmallow pops
  • Chocolate covered apples

This choice couldn’t be more appropriate especially since my daughter’s all time favorite food is an apple so I’m sure she’ll be more than thrilled to see apples galore all over the place. It’ll definitely be a memorable birthday for our little one and Mommy and Daddy too. Stay tuned for the full birthday recap early next week after the big day but before then you might just catch a sneak peak of the birthday girl herself in her vlog debut showing off her new Snow White dress!

Sincerely,

Lindsay

What’s On Your Gluten Free Menu For Thanksgiving?

Is anyone as surprised as I am that we’re only a few days away from Thanksgiving? This Fall seems to have just flown by, but I for one am super excited for all of the holiday festivities. For us the holiday family get togethers really commence with the November birthdays, these are only the start of what will be a number of family events of the season. This past weekend we rang in my dad’s belated 60th birthday and my nephew’s 8th birthday, a number I’m still having a hard time grasping. It’s like I blinked and he become an eight year old, much like how I’m in the midst of planning my daughter’s 2nd birthday party that’s rapidly approaching right behind Thanksgiving. Stay tuned to learn more about her Snow White 2nd Birthday!

For now, our holiday celebrations continue with the big Thanksgiving dinner this week. With only a few days to go, I have yet to even go buy my ingredients, so needless to say I’m not quite ready yet. This year is a bit different than the past few since we’re celebrating with my family rather than Dan’s. Unfortunately my severe cat allergy gets in the way of joining in with their fun. As much as I’m a lover of all of God’s creatures, these darn cats make it really tough by making breathing an impossible task. So needless to say in an attempt to enjoy a Thanksgiving full of clean air and breathing and free of cat dander, it’s onto my cat-free family’s house this year. But even though we’re not sharing the dinner table with Dan’s side, I’ll still try to bring a little of their family love to our table too. So do you want to see what’s in store for our gluten free, and really dairy free too thanks to my nephew, Thanksgiving dinner?

Main Dishes:

  • Turkey and Gravy
  • Gluten Free Stuffing

Sides:

  • Mashed Potatoes
  • Canned Asparagus (I love how soft the asparagus gets like this, even though I do enjoy fresh asparagus too this is a staple for our Thanksgiving dinner)
  • Mashed Cauliflower
  • Sweet Potatoes with Apples and Marshmallows
  • Coleslaw
  • Deviled Eggs
  • Cherry Jello with Whole Cherries 
  • A little surprise for Dan, his mom’s Crab Dip
  • Non-gluten free rolls

Dessert:

  • Pies galore, gluten free and non-gluten free thanks to my Dad
  • Chocolate Pudding
  • Thanks to Katz, tons of gluten free/dairy free/nut free/soy free Pumpkin Pie

So that’s what our menu is shaping up to look like so far, what about yours? Share any of your favorite gluten free family recipes, I’m always looking to add to my gluten free table!

Sincerely,

Lindsay

A Mommy And Me Gluten Free Fall Lunch At Wildflour’s Bakery/Cafe

On one of the many beautiful fall days that we were blessed to have this year, little one and I ventured out for an early little lunch at my favorite gluten free friendly restaurant. Wildflour Bakery/Cafe is a local hidden gem that offers a huge selection of gluten free breads and pastries along with a savory menu, all of which you can enjoy in house or on the go. Since we were out to have some extra special Mommy and Me time, a lunch out was definitely in order so we picked the perfect table in the empty dining room and nestled in to enjoy a wonderfully gluten free lunch.

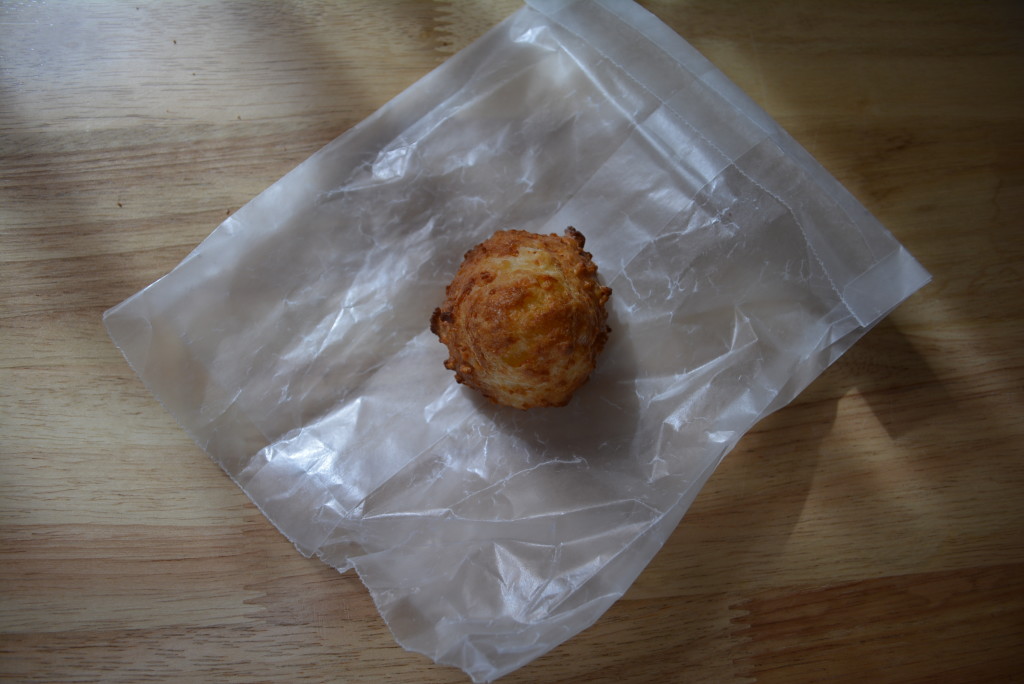
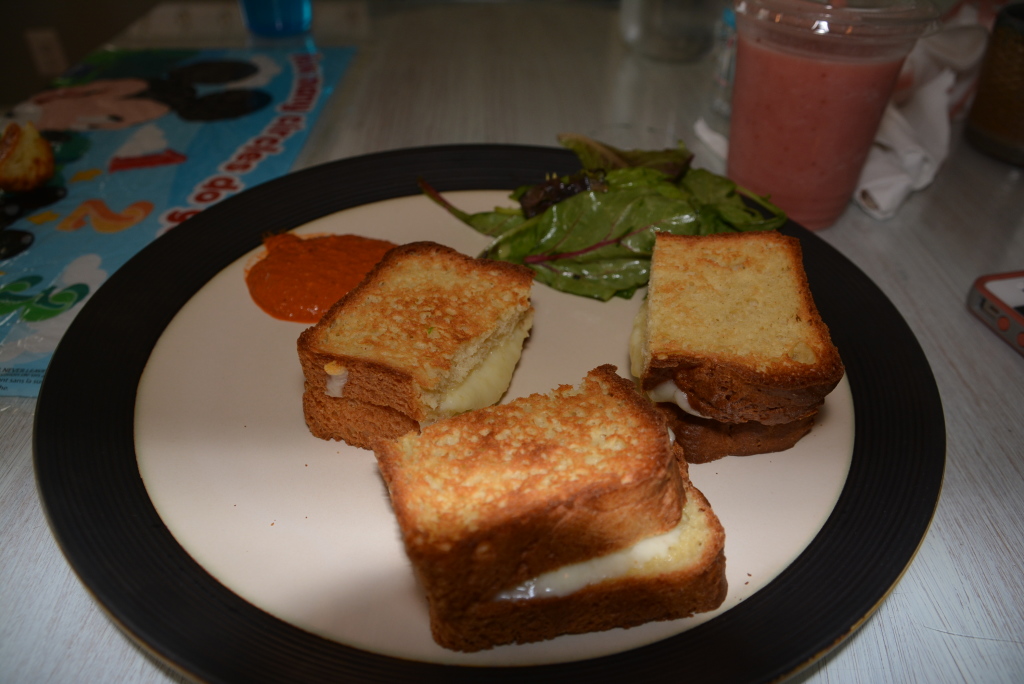
While the highlights for me at Wildflour Bakery/Cafe are by far on the bakery side of things, the dining menu is just as wonderful, they’ve just been super successful in wooing me with all of their delectable gluten free treats. As far as the menu, they have so many delicious choices, take a look for yourself here, but I usually am a creature of habit and if I find something that I like I tend to go with it each time after until I need a break. I decided this time around to go with a perfect lunch option that both me and my little one would enjoy, a grilled cheese sandwich big enough for us to share and my favorite, their strawberry banana pink smoothie that would sure to please my little girl. While we waited for our sandwich, I decided to request a few of their doughy, cheesy heavenly Brazilian Cheese Puffs, just to tide us over. These are one of Mommy’s favorites and turns out now one of my little one’s favorites too. 

Brazilian Cheese Puff
Brazilian Cheese Puff from one of our previous trips.

Soon enough our Grilled Cheese and Pink Smoothie had arrived. Little one dove into her very own cup of smoothie and couldn’t get enough of it. I had to insist on a few breaks to get in some of the grilled cheese but the winners by far in her book were the smoothie and cheese puffs. The grilled cheese for mommy was just as delicious as I remembered. It’s made on their housemade gluten free bread which beats any of the store bought varieties, you can just taste of all of the love that’s cooked into their food.  

DSC_0397
Gluten Free Grilled Cheese: Wildflour Bakery/Cafe

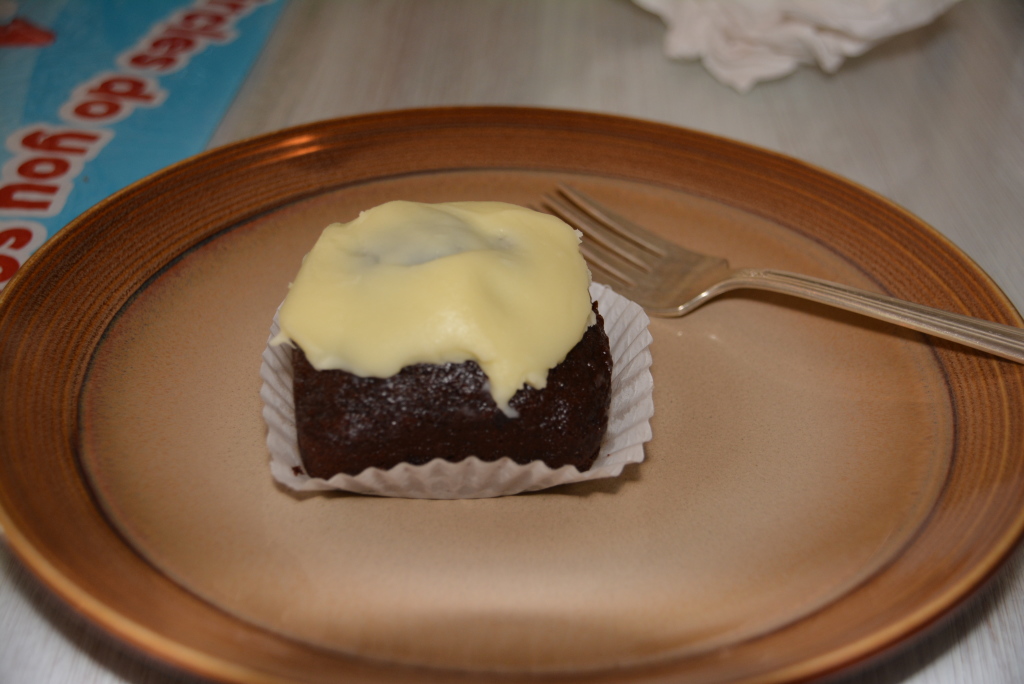
With our smoothies disappearing and our sandwich plate beginning to empty, I decided to top off our special lunch with a sweet treat. So I sprung my little one from her highchair so we could head over to the bakery cases and pick out just the right treat. Cookies, tarts, scones, cheesecake, and brownies  galore, the cases were just overflowing with mouthwatering gluten free goodness. My little one though had her eye on an extra special chocolate treat, a chocolate brownie cake covered in a banana ganache icing. So we picked out our dessert, made our way back to our private table, and waited with anticipation for its arrival. Finally, our sweet finish had arrived, it was the perfect dessert made for sharing for just little one and me. The chocolaty cake was so moist and brownie like and when combined with the banana icing, so delicious! Our plate was cleaned with only a few minutes worth of work, so I think that’s a pretty reliable testament to just how tasty this dessert was. It was a perfect lunch for just us two, good food, full bellies, and plenty of smiles and laughs to go around!

DSC_0409
Chocolate Banana Ganache: Wildflour Bakery/Cafe

Besides the delicious menu items that Wildflour Bakery/Cafe offers, the true joy of dining here is the ability to eat a meal with comfort and without fear of cross contamination. This restaurant is 100% gluten free, hence their bakery cases that are filled with unique bakery sweets and their menu overflowing with sweet and savory concoctions are 100% gluten free too. What an absolute treat to be able to choose from anything off of a menu without adjustment. As always, this trip to Wildflour’s was a true pleasure and I’ll anxiously be planning our next to go or dining in visit. Make sure you take a peak at all of my other Wildflour adventures in Gluten Free Living In A Non-Gluten Free World.

Sincerely,

Lindsay


Oatmeal Chocolaty Raisin Gluten Free Cookies That Are Sure To Impress This Holiday Season

Not too long ago I shared with you a very special review of one of my favorite gluten free cookbooks by BabyCakes in my very first vlog! I hope you caught on to how much I love their cookbook because I do, I really do! Each one of their recipes uses a reasonable amount of gluten free ingredients that you stock up on one time and you’re good to enjoy countless recipes down the road. And just as an added bonus, they use one of my favorite gluten free all purpose flours out there, by Bob’s Red Mill.   

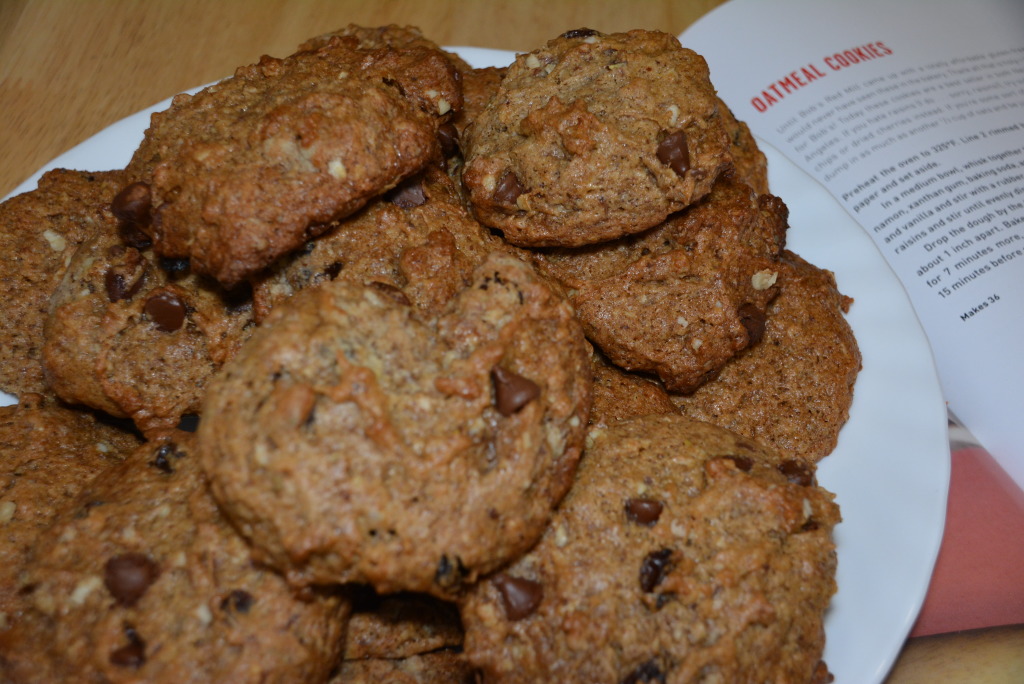
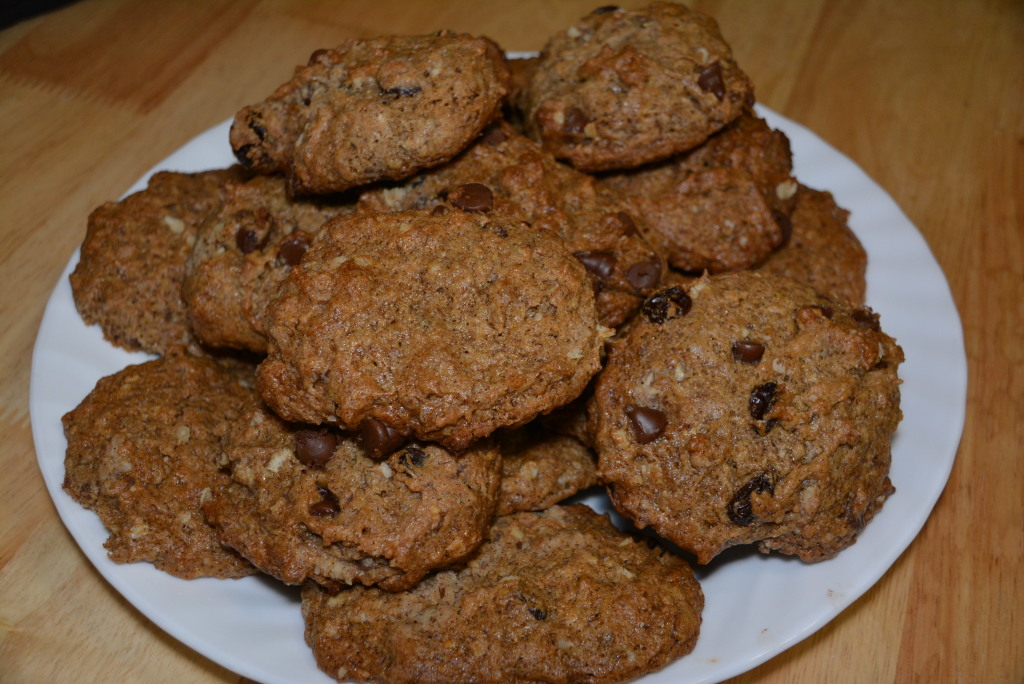
So with the holidays rolling around, I thought I’d remind you about their fantastic BabyCakes Covers The Classics cookbook that shares amazing allergy free cookie recipes. They share your basic cookie recipes, made special by BabyCakes of course, to some pretty special kinds that’ll surely be gobbled up by all, making it pretty tough to keep some around to put out for Santa Christmas Eve night. One of my favorites happens to be a classic cookie that I honestly haven’t tasted in my gluten free life, that’s the Oatmeal Raisin Cookie. I teasingly shared a glimpse of my special batch with you on my vlog but now today I thought I’d share the recipe with you too. Now, BabyCakes gives you the basic Oatmeal Cookie recipe but suggests a few swap outs or changes that would work too. I decided to add a little twist inspired by my all time favorite gluten free candy, Raisinets. So without further ado, I introduce you to Oatmeal Chocolaty Raisin Cookies! Baby Cakes Oatmeal Raisin Cookies (17)

Ingredients:

  • 1 3/4 cups Bob’s Red Mill All Purpose Gluten Free Flour
  • 1 cup sugar
  • 1/2 cup Gluten Free Oats (I actually used the new Plain Gluten Free Oatmeal by Chex.)
  • 1/4 cup Ground Flax Meal (I always use Bob’s Red Mill which is certified gluten free.)
  • 2 tbsp Ground Cinnamon
  • 1 1/2 tsp Xanthan Gum
  • 1 tsp Baking Soda
  • 1 tsp Salt
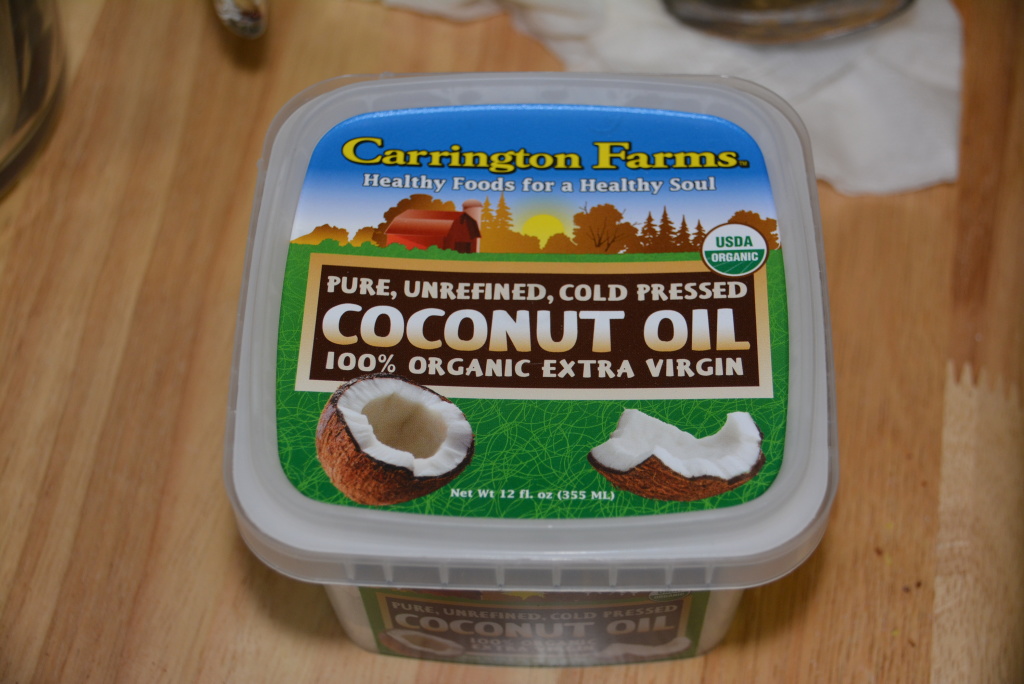
  • 1 cup Melted Refined Coconut Oil (Pick a gluten free variety like the one by Carrington Farms. Alternatively you can use a canola oil.)
  • 1/2 cup Unsweetened Applesauce (I like Musselman’s which states gluten free on the label.)
  • 2 tbsp Vanilla Extract (Always make sure it’s pure vanilla extract, McCormick’s is gluten free.)
  • 3/4 cup Raisins
  • 3/4 cup Milk Chocolate Chips (Hershey’s are gluten free.)

Note: Feel free to use less chocolate if you prefer just a hint of chocolaty flavor or you could get really fancy and add in Raisinets instead of the raisins and chocolate chips but this is just a slightly less sugary method. 

Directions: 

  • Preheat your oven to 325 degrees and line 2 baking sheets with parchment paper. 
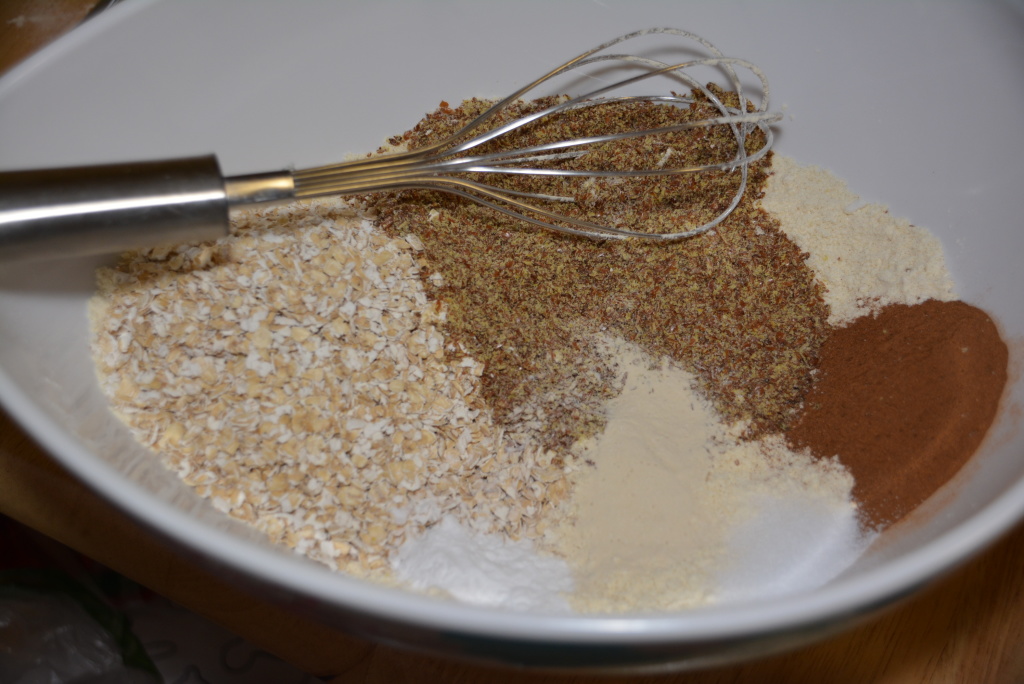
  • Using a whisk, combine all of the dry ingredients into a large mixing bowl including 1 3/4 cups gluten free all purpose flour, 1 cup sugar, 1/2 cup gluten free oats, 1/4 cup flax meal, 2 tbsp cinnamon, 1 1/2 tsp xanthan gum, 1 tsp baking soda, and 1 tsp salt.  Baby Cakes Oatmeal Raisin Cookies (6)
  • Next, melt 1 cup coconut oil for measuring, which I like to do in a glass measuring cup.  Baby Cakes Oatmeal Raisin Cookies (7)
  • Add 1 cup of your melted coconut oil along with 1/2 cup applesauce and 2 tbsp vanilla to the dry mix and gently stir with a rubber spatula until a thicker dough forms. 
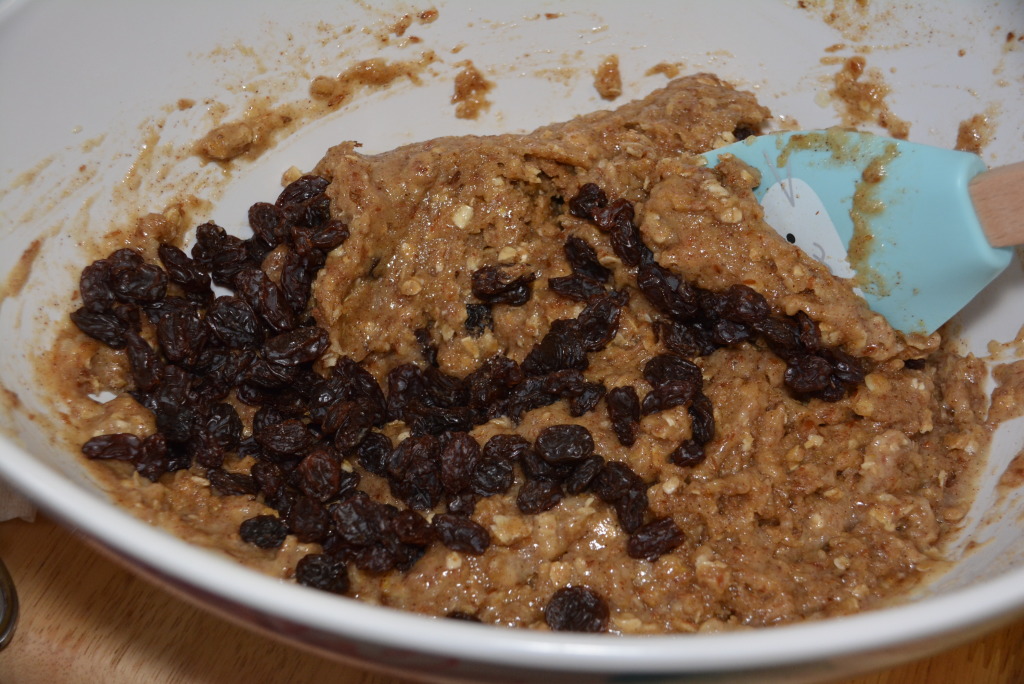
  • Finally, add in 3/4 cup raisins and 3/4 cup chocolate chips. If you want to make some raisin cookies without chocolate, add your raisins and mix your dough up, split your dough into two, and add just half the amount of chocolate chips to one bowl of dough.  Baby Cakes Oatmeal Raisin Cookies (9)
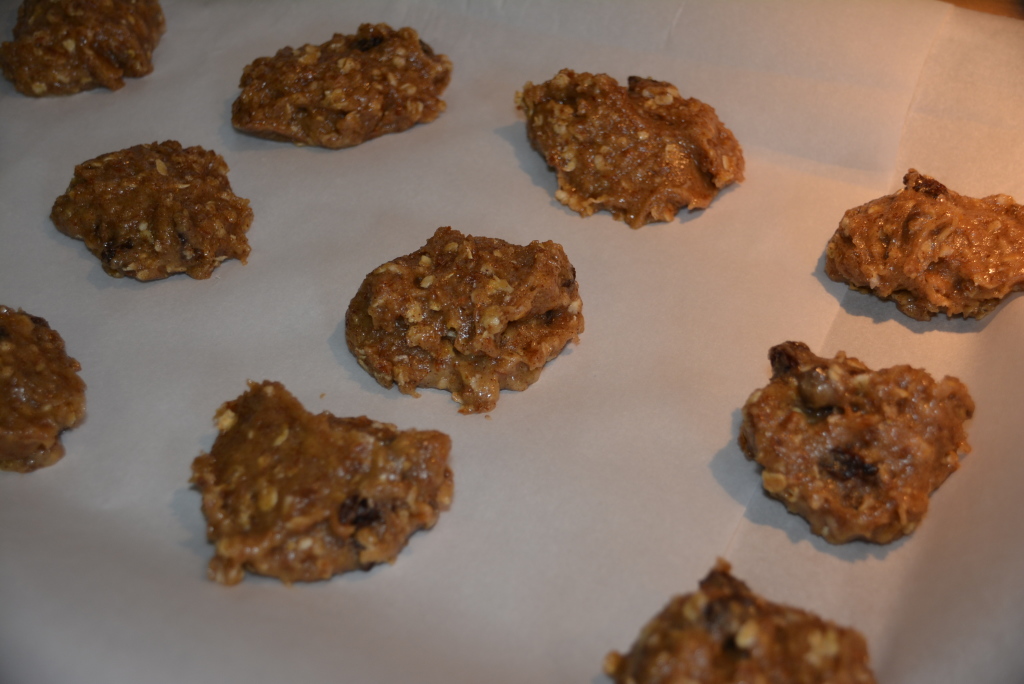
  • Using a tablespoon, drop the dough by spoonful onto the parchment paper covered baking sheets.  Baby Cakes Oatmeal Raisin Cookies (11)
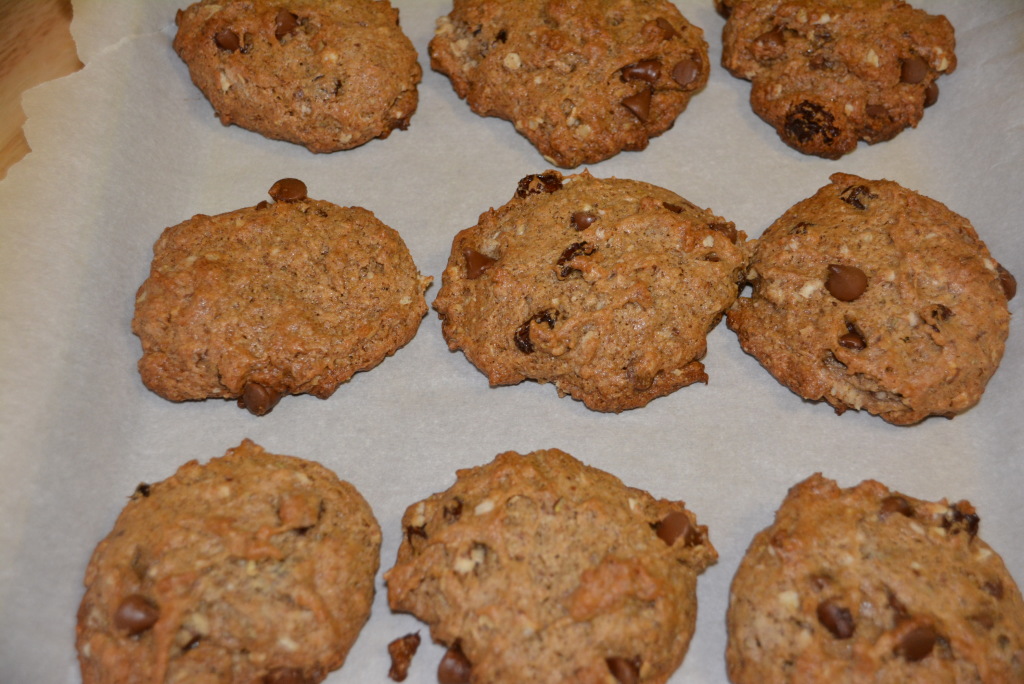
  • Bake for about 8 minutes, turn the baking sheet 180 degrees, and bake for an additional 7 minutes until your cookies turn golden brown. Always make sure you keep an eye on your cookies and cook times. Sometimes you may have to cook a little longer or a little shorter depending on your oven. Baby Cakes Oatmeal Raisin Cookies (12)
  • Remove your baking sheets from the oven and let the cookies cool a bit on the baking sheets for about 15 minutes and enjoy! Baby Cakes Oatmeal Raisin Cookies (15)

As I’m sure we all could agree, gluten free baking in general is no easy task. It’s really tough to get just the right texture without changing the flavor for the worse. But somehow, someway BabyCakes makes gluten free baking look easy and taste perfect! And I just love that through their cookbooks we too can learn the secrets behind the tastiness of their recipes and tons of gluten free baking tips and tricks between. Thanks to their cookbooks I feel a bit more confident in my gluten free baker’s shoes, and not too afraid of unique ingredients that appear all too often in gluten free baking. So make sure you snatch up a BabyCakes cookbook for your gluten free holiday baking this year and in the meantime, try my Oatmeal Chocolaty Raisin Cookies!

Sincerely,

Lindsay

Oatmeal Chocolaty Raisin Gluten Free Cookies
Write a review
Print
Ingredients
  1. 1 3/4 cups Bob's Red Mill All Purpose Gluten Free Flour
  2. 1 cup sugar
  3. 1/2 cup Gluten Free Oats (I actually used the new Plain Gluten Free Oatmeal by Chex.)
  4. 1/4 cup Ground Flax Meal (I always use Bob's Red Mill which is certified gluten free.)
  5. 2 tbsp Ground Cinnamon
  6. 1 1/2 tsp Xanthan Gum
  7. 1 tsp Baking Soda
  8. 1 tsp Salt
  9. 1 cup Melted Refined Coconut Oil (Pick a gluten free variety like the one by Carrington Farms. Alternatively you can use a canola oil.)
  10. 1/2 cup Unsweetened Applesauce (I like Musselman's which states gluten free on the label.)
  11. 2 tbsp Vanilla Extract (Always make sure it's pure vanilla extract, McCormick's is gluten free.)
  12. 3/4 cup Raisins
  13. 3/4 cup Milk Chocolate Chips (Hershey's are gluten free.)
Instructions
  1. Preheat your oven to 325 degrees and line 2 baking sheets with parchment paper.
  2. Using a whisk, combine all of the dry ingredients into a large mixing bowl including 1 3/4 cups gluten free all purpose flour, 1 cup sugar, 1/2 cup gluten free oats, 1/4 cup flax meal, 2 tbsp cinnamon, 1 1/2 tsp xanthan gum, 1 tsp baking soda, and 1 tsp salt.
  3. Next, melt 1 cup coconut oil for measuring, which I like to do in a glass measuring cup.
  4. Add 1 cup of your melted coconut oil along with 1/2 cup applesauce and 2 tbsp vanilla to the dry mix and gently stir with a rubber spatula until a thicker dough forms.
  5. Finally, add in 3/4 cup raisins and 3/4 cup chocolate chips. If you want to make some raisin cookies without chocolate, add your raisins and mix your dough up, split your dough into two, and add just half the amount of chocolate chips to one bowl of dough.
  6. Using a tablespoon, drop the dough by spoonful onto the parchment paper covered baking sheets.
  7. Bake for about 8 minutes, turn the baking sheet 180 degrees, and bake for an additional 7 minutes until your cookies turn golden brown. Always make sure you keep an eye on your cookies and cook times. Sometimes you may have to cook a little longer or a little shorter depending on your oven.
  8. Remove your baking sheets from the oven and let the cookies cool a bit on the baking sheets for about 15 minutes and enjoy!
Adapted from BabyCakes
Gluten Free Mom To Be http://www.glutenfreemomtobe.com/

Soft And Pillowy Gluten Free Gnocchi Just As Perfect As Dreamed They Would Be And Now A Little Cheaper Too

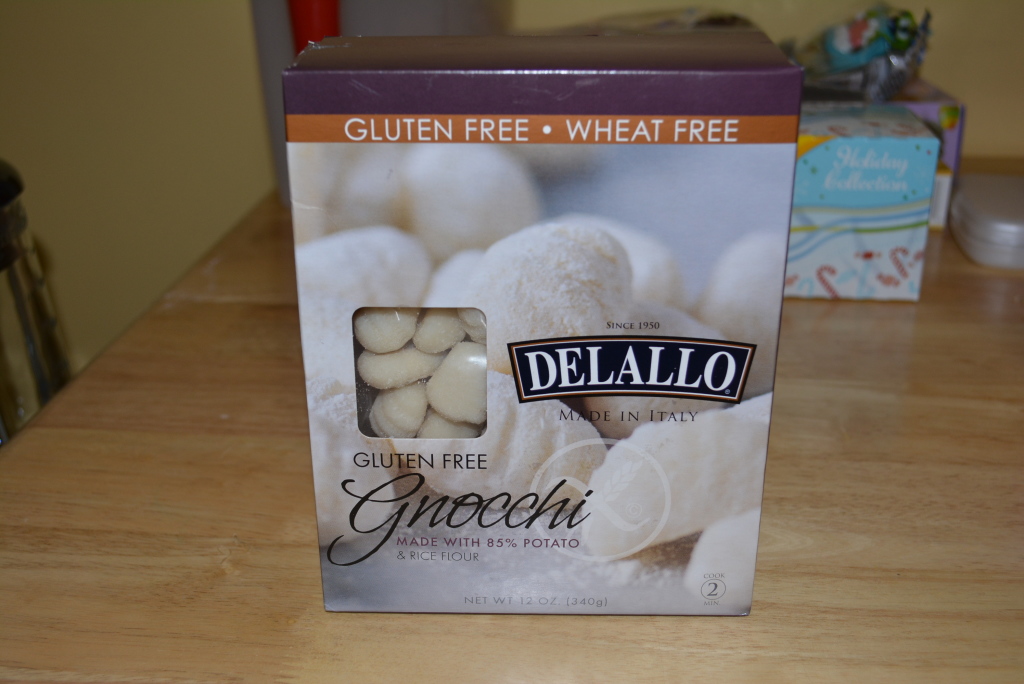
Does anybody remember when I raved about the gluten free gnocchi that I had while eating a little while back? Okay, so I had them again recently from Palermos and they were just as delicious as they were the first time and reminded of the amazing gluten free gnocchis that I bought to try at home not too long ago. These gluten free gnocchis are made for us courtesy of DeLallo Italian Foods, who have put together a number of other standout gluten free Italian products but for me the star are their unique gnocchis.  Delallo Gnocchi Blog Pics (2)  It’s extremely rare to be able to find gluten free gnocchi, let alone authentically Italian ones that haven’t been coated in gluten filled flour. However, thanks to DeLallo, you can now get your hands on some gluten free gnocchi straight from Italy and taste every bit of it. They’re light and airy just like little pillows and absorb any sauce flavor spectacularly. They really are little bites of heaven! You ready to try them yet? Okay, well not yet because you can save a little on your gluten free Delallo purchase with this $1/1 coupon on their site. So hurry up, print this coupon and head out to your local grocer, I found mine at Wegmans, and pick up some of these fo rdinner tonight!  

Sincerely,

Lindsay

Ever See A Gluten Free Soft Pretzel? I Have And I’ve Been Lucky Enough To Taste One Too Thanks To Tonya’s Gluten Free Kitchen

Do you remember those huge soft pretzels that you could grab in long sticks at amusement parks or maybe those fun Mickey faces in Disney World? They are a distant but very fond memory for me as these were always my favorite snack when we went on vacation or a day trip. A little bit of salt topped with a little yellow mustard and I was good to go to enjoy the deliciousness of the doughy snack. With all of that chewiness though came a whole lot of gluten which meant one very sick girl.

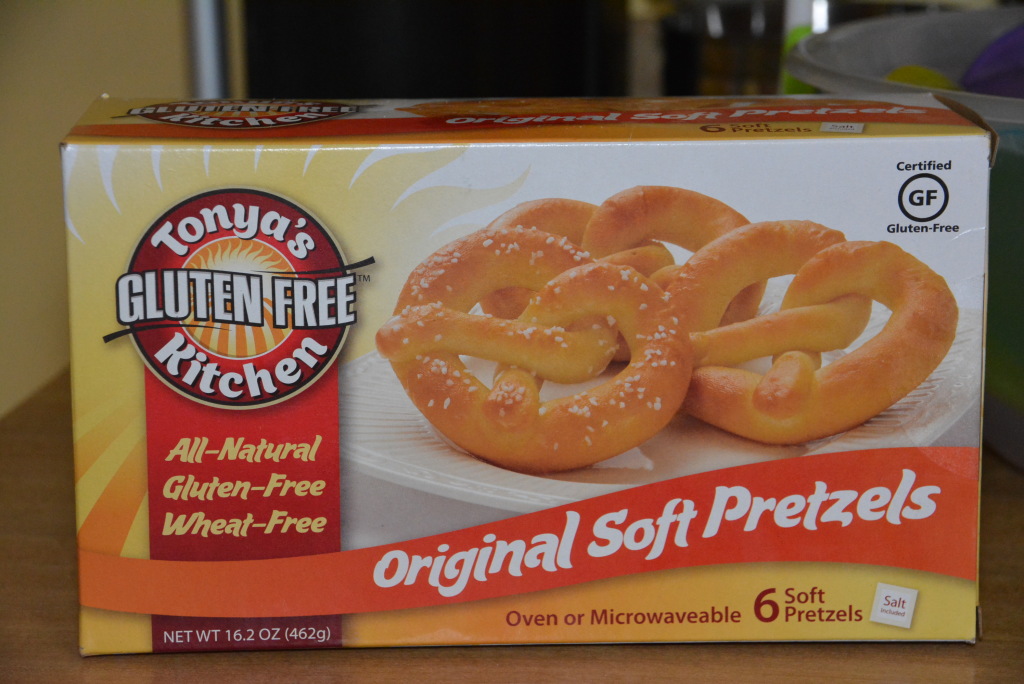
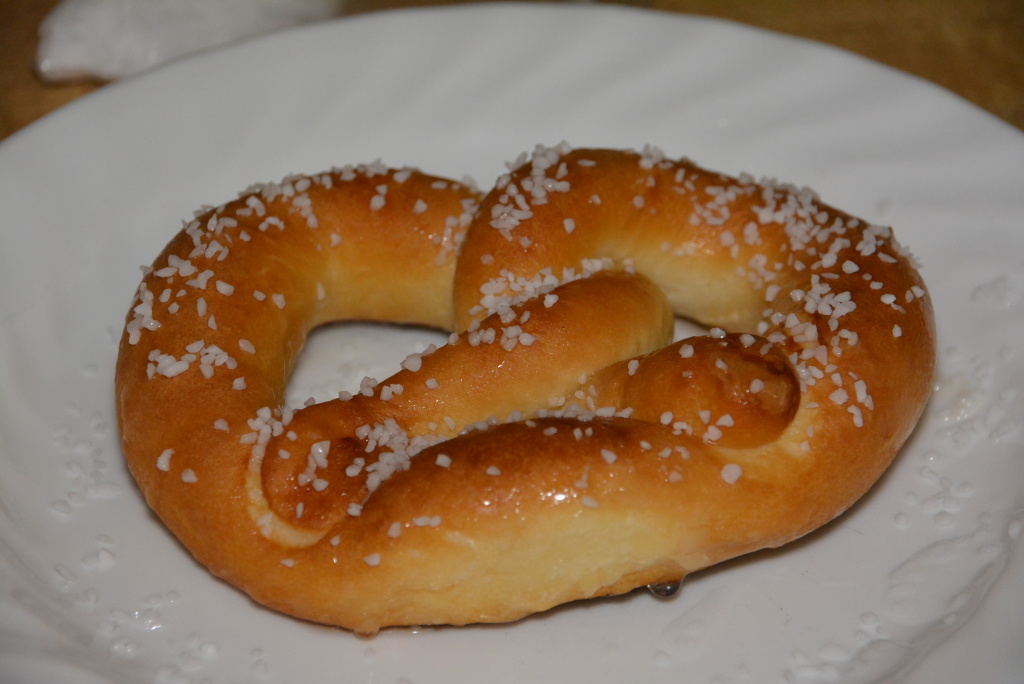
So, when I went gluten free, like many gluten filled eats and treats, soft pretzels too got the heave-ho and have been missing from my diet for a number of years. I’ve always kept my fingers crossed that I might one day see them in a grocery store next to the Super Pretzels or maybe even at an amusement park, very optimistic I know. I honestly never thought that finding a gluten free, soft and chewy pretzel would be as tough as it actually has been; I mean it literally has been like searching for a unicorn. Until now that is! I finally caught wind of Tonya’s Gluten Free Kitchen who makes three kinds of gluten free soft pretzels including original regular size, original pretzel bites, and cinnamon sugar! I was so excited when they offered to send me a few samples and after just one bite I immediately headed to my local grocery stores to scout out where these might be available. I’m lucky enough to be able to snag these at a small allergy free shop by me but also at Wegmans, I’m still hoping that my Shop Rite 5 minutes away will catch on one of these days too. But no worries, if you can’t find these at a local store you won’t miss out because you can buy them here on Tonya’s website. And by the way, these are that good that I immediately stocked up on a few boxes to enjoy in the months to come.    Soft Pretzel (1) Okay, so now onto the actual pretzel itself in all of its gluten free glory. Not sure if you remember these but I used to enjoy Super Pretzels frozen soft pretzels at home from time to time. Tonya’s Gluten Free Kitchen match these in every way. After using water to add some salt or leaving them plain, all you do is microwave for under 1 minute and voila you have a soft, gluten free pretzel to enjoy. The size of these beauties is exactly how big a regular frozen pretzel would be, good news especially since everything gluten free seems to be miniature in size but big in price. And texture and taste wise, Tonya’s gluten free pretzels are a perfect, chewy pretzel that have that amazing doughy texture after just a short microwave. You can top them with the salt that’s provided or leave them plain if you prefer. And feel free to be creative with your dipping sauces on the side. I’m a plain girl when it comes to pretzels, I like to just dip them in a little bit of yellow mustard, but with or without the mustard these are perfection. I for one am so glad that Tonya’s has added these back into my life, now if only Disney World could come out with a Mickey shaped gluten free pretzel, then we would be good to go. A girl can dream can’t she?!?! Soft Pretzel (2)  So for the last piece of the gluten free soft pretzel puzzle, the cost. These aren’t the cheapest of snacks to enjoy but to be fair not many gluten free premade snacks are. I usually can get these for about $8.99 a box, regardless of the variety, and in a box you get 6 original size pretzels or the number of pretzel bites that’s equivalent to that. Do I wish the price was a tad bit cheaper than about $1.50 a pretzel? Sure, but as with everything in our world, gluten free items are by nature more expensive and the more special and unique an item is the more pricey it can be. Tonya’s Gluten Free Kitchen is a strictly gluten free business who is single handedly spearheading the addition of gluten free pretzels into our world. With growing support, their popularity will hopefully grow too, adding them into more and more mainstream grocery stores eventually making their products more affordable. Until then, this hard working, gluten free mommy will continue to treat herself to these gluten free delicacies while also supporting the pioneers of our gluten free community

Congratulations Tonya’s Gluten Free Kitchen! You’ve done a fabulous job and I for one am so grateful for your hard work and tasty product!

Sincerely,

Lindsay 


Congratulations, You’re Pregnant! How Did You Survive Your First Trimester While Being Gluten Free?

I can still remember the day we found out that we were expecting our little girl. Of course we had been trying so I suppose seeing a positive shouldn’t have been too shocking but for some reason a positive pregnancy test will always make your heart skip a beat and give you instant butterflies in your stomach. I, like many others, couldn’t wait until the skipping a period sign so I took my first test on the earliest possible day, Bad move, since it came back negative and left me very disappointed. So, Dan and I agreed to wait a few more days and try again, little did we know what that day would bring.

It was early on a Sunday morning and we had one more non-digital, line reading test. I left the test on the bathroom counter while I went about my early morning routine, almost forgetting to check back in the right amount of time. We decided to take a look together and I think our jaws both dropped at the sight of a faint second line. In fact, my husband was so surprised he ran to the Rite Aid down the street and bought some digital tests for a more definitive answer. Sure enough, a few short minutes of a flashing hourglass and the word pregnant illuminated the screen. We were pregnant!!!

Next to our wedding day and the actual birth of our daughter, I can’t remember a more nerve wracking/exciting time other than when I find out that we were pregnant. As the worrier of all worriers, how I was going to navigate a pregnancy gluten free was one of my main worries since Day 1. From dealing with the first trimester aches and pains without the normal gluten standbys and satisfying those cravings for my favorite gluten sweets from years past that were sure to come down the road, the questions were endless. But for the immediate future I was just crossing my fingers, toes, and everything else that could be crossed that I would survive the first trimester by any gluten free means I could. Check out how I relieved some of my first trimester symptoms. 

Nausea 

I was certainly lucky, I only experienced the occasional morning sickness during the first trimester, but to my surprise, later on towards the end of my pregnancy, I experienced a lot more all day nausea than I had at the beginning. This was a tough symptom to work with seeing as I always used to combat nausea with my favorite saltine crackers. Unfortunately in the gluten free world, a perfect saltine cracker substitute has yet to make its debut, but I definitely made do with the crackers that were on hand at the time. Some of my favorite options at the time were by Wellaby’s, who makes some great crackers that have the perfect texture with a smidge of flavor too, along with Glutino who offers some plain crackers along with some light bagel chips. These weren’t the perfect substitute for saltines but they did the trick for me at the time, but I’d have to say now since my first pregnancy, Schar has introduced some perfect cracker options to try. Schar now offers some standard Table Crackers that are really mild and texturely on point but also they have their Entertainment Crackers which taste and feel just like Ritz Crackers. Any of these can certainly help with your nausea, but I have some other suggestions too if the crackers don’t cut it.

Like I mentioned before, my nausea really kicked in towards the end of my pregnancy and was more all day sickness than just morning. Sometimes the crackers were the only thing I could keep down but for a little extra help I also tried adding some ginger to my diet. Ginger is a popular go to for nausea relief and my doctor gave me the okay and the 100% healthy approval to go ahead and try it. I first gave a type of ginger tea a whirl, one in particular that I could stomach was the Lemon Ginger by Twinings. If you enjoy drinking hot tea, this is a great option for you and it definitely helped me with my nausea too as an added bonus. You could also try drinking ginger ale, I preferred this one to the tea, just make sure it’s a ginger ale that was made with real ginger so get the benefits of ginger. Also, just a little tip, I woud always stir my ginger ale until the carbonation died down a lot because all of the bubbles usually didn’t sit well, not to mention they would add to my bloating. And in case you needed one more ginger option, aside from drinking it and cooking with it, there are these gluten free hard candies by GoNaturally. Their ginger hard candies are gluten free, as well as free of many other allergens too and could definitely provide some relief. I had a whole package of these on me at any given time; the combination of sucking on a hard candy that has some of the relieving ginger in it helped me on more than one occasion, especially while out and about.  

One of my main go tos though for nausea relief were the Sea-Bands. These are great and I’ve used them on many an occasion from motion sickness during our travels to periodic nausea here and there when I’ve been sick. They’re a natural approach to dealing with nausea that is completely safe while pregnant too. In case you haven’t heard of these before, they’re just wrist bands that work by acupressure; you wear these bands at a specific place on your wrist where a little knob on the inside of the band pushes on a pressure point. They definitely worked for me, in fact I think you’d spot me many day, all day wearing these attractive 80s sweat band kind of wrist bands. So if you want to give a non-medicine, non-food thing a try, than go with the Sea-Bands, they definitely have worked for my nausea, pregnant and not.

Acid Reflux/ Heartburn 

Acid reflux was one of those lovely symptoms that I saw through my first, second, and third trimesters. With all of that heartburn, it wasn’t a surprise for me that the old wives tale of heartburn indicating lots of hair on your newborn’s head held true, as my little girl was born with a full head of dark brownish blackish hair. But even though I wondered the entire pregnancy if the old wives tale would be true for me, I was still desperate for some relief. In fact at the end, it had gotten so bad that I had to take Zantac, doctor approved and perfectly safe to take at the end of pregnancy, everyday to try to deal with the burning feeling inside that just wouldn’t budge. But at the beginning it wasn’t too bad and I could usually get some relief from some gluten free Tums. Just a note, I usually buy the Target brand that are not only cheaper but also marked gluten free on their bottle. These are absolutely safe to take even early on in your pregnancy so if you don’t get any relief from diet changes than give Tums a try.

If you are experiencing acid reflux, aside from trying Tums, you can also check out some food and diet adjustments that may help too. There are definitely some foods that can cause that burning sensation without any problem in the average individual, let alone in a pregnant woman. Eating chocolate, caffeine, really fatty foods, but most of all citrus foods or juices can all cause acid reflux. I know for me, I loved eating fruit when I was pregnant and drinking juice but I had to limit it because of all of the acid reflux. So if some of these are staples in your diet, try scaling back a little and see if you get some relief that way. 

Aside from diet adjustments, try changing a few habits that could worsen your naturally, pregnancy caused acid reflux. Avoid eating too close to going to bed at night. Try to limit what you eat before bed to something light and easily digested so your body isn’t working in overdrive when you lie down. Also, when it is time to get some sleep make sure you prop yourself up on a couple pillows to keep your upper body angled. As I’m sure many of you realize, lying with your head or upper body elevated can help a number of ailments, so I personally always sleep like that but especially when it comes to acid reflux, sleeping like this can help prevent stomach acids from creeping up and giving you that burning feeling in your throat. 

Bloating 

This was one of my biggest symptoms since Day 1 of my pregnancy, but thankfully it just stuck around for the first trimester and lessened quite a bit during the latter part. But when I say bloated, I mean stomach was hard as a rock and stuck out a few inches. That feeling was sadly all too familiar for me and took me back to my gluten days where I’d wake up feeling that same balloon feeling every single day; thankfully the reason for that same feeling now was a much happier one.

As far as relief for this symptom, that’s a tough one, especially since I had such severe bloating but there are definitely some tips and tricks that I tried that gave some relief. The first route you should go is to avoid food and drink that may worsen your situation. For example, things like cauliflower can cause really bad bloating for me, so even though I really enjoy it, I avoided it completely. Other food/drink items that might be triggers to worsen your pregnancy bloating could include some other vegetables like beans, too much dairy or sugar can contribute, and finally carbonated drinks. The carbonation along with the sugar, let’s say in soda can be a huge problem, but at the same time drinking Ginger Ale for example was a necessary evil for me to relieve some nausea. So if you still want to or need to enjoy a carbonated beverage here and there, try stirring a small glass of the drink until the bubbles go away, several minutes or so, and that way you can still enjoy the taste or flavor, and also the relieving effects too, but without the bubbles.

One last thing that can help with your bloating is to get moving. Trust me, I know going for a walk or doing yoga isn’t the first thing you want to do while you’re dealing with a multitude of pregnancy symptoms but moving around can lessen some of these. Something as simple as going for a walk can break up some of that bloating just enough to give you some relief. So why not give it a try, it may just work for you!

A little tip to my fellow gluten free mommy-to-bes, when you’re gluten free and expecting it’s very important to keep being as vigilant with your gluten free diet as you normally would be. We all remember what we felt like when we used to eat gluten on a daily basis and if that was so long ago that it’s a faint memory, I’m sure we can all recall a glutened event in our gluten free life that left us feeling far from spectacular. Intentionally or accidentally consuming gluten or wheat can worsen your first trimester symptoms, especially since gluten/wheat already are triggers of bloating in the average individual, for us they’re even more detrimental. So if you’re experiencing the pregnancy bloating that I definitely did, try some of the tips that I offered for relief and also make sure that there’s no gluten or wheat slipping into your diet by accident, but mostly just remember that this to shall pass and there will be a day of relief in your future. 

At any point during my pregnancy, especially the first trimester, you could open my purse and see a bottle of water, tons of ginger candies, ziploc bags of crackers, sea-bands, and Tums, a pregnancy purse of champions I like to say. While every trimester has it’s tough parts, in the first trimester you’re facing so much uncertainty and anxiety, along with new physical challenges that you have to be prepared to deal with at the drop of a hat, hence the purse of remedies. It can be tough but always make sure you talk to your doctor about all of your symptoms. Taking to your doctor can not only assure you that that symptom is perfectly normal, but they’ll also be able to provide you with some safe treatment options. But what’s most important is that you can’t be afraid to try them out. Just remember, as long as your doctor says that those treatments are perfectly safe for your baby, there’s no need for you to be uncomfortable and ill, so try them out. 

So good luck to all of you newly, expecting mommies, gluten free or not! Make sure you share with me what pregnancy symptoms you’re facing and how you’re dealing with them. Through so much of my pregnancy I hoped there was someone else out there that was experiencing and feeling exactly how I was, but I just couldn’t find them. So please share what you’re first trimester is looking like and I’m sure you’ll meet some other expecting mommies that are feeling the same way!

Sincerely,

Lindsay 
 

There’s Only 3 More Weeks Until Thanksgiving, Make Sure You Get Your Katz Pies Soon!

It’s hard to believe but we are only 3 weeks away from Thanksgiving. Time has literally flown by, as it always does this time of year. It seems like once October rolls around, the weeks pass so quickly, probably because the last few months of the year are loaded with birthdays and holidays in our family. November alone holds the birthdays of 3 family members and 2 friends along with Thanksgiving of course, and shortly after follows December with three more family birthdays, including my precious little angel’s, one friend’s birthday, and my favorite holiday of the year. I always feel like we’re bouncing from one party or event to another but to be honest, I just love all of the time that we spend with family that we don’t necessarily get to see everyday which is exactly why Thanksgiving ranks in my top 3 favorite holidays.

Every year about this time, the holiday decorations start rolling out in stores, Christmas music pops on here and there, and Christmas shopping commences, and I just love every bit of it. What I’m not a huge fan of though is all of the holiday dinner commercials flashing on the tv which are a constant reminder of the two big family dinners that are looming ahead of me. Don’t get me wrong, I love the family part, it’s the dinner part that worries me. Not all of my family always remembers or understands my gluten free diet so the dishes they bring are always in question but my parents, and in recent years my mother-in-law and her husband, have always been the best at accommodating, taking a lot of the worry out of at least a couple of the main dishes.

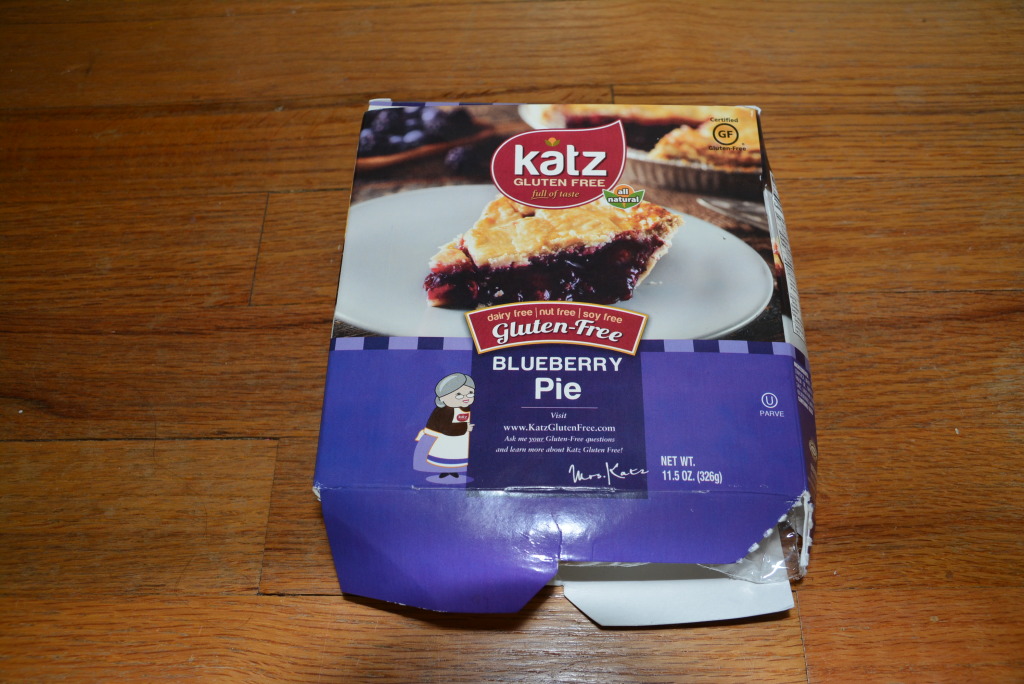
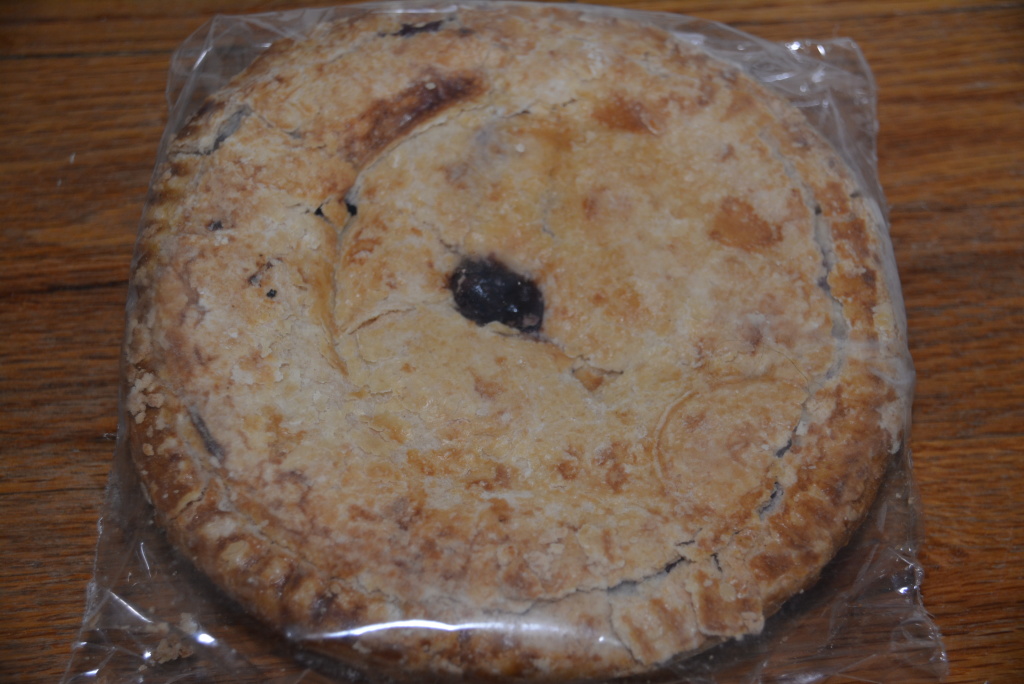
My love of cooking has definitely grown over the years, so I’m always more than happy to contribute a few dishes to the meal, especially ones that are gluten free, and when I can dairy free and egg free for my nephew to enjoy too. I always like to add a few of our family’s savory favorites that have become traditions over the years and then add in a dessert here and there. The past few years, my go to for pre-made gluten free sweets has been Katz Gluten Free. They’ve consistently delivered some fantastic items that certainly do the gluten free world justice. When I first noticed that they offer pies, I was shocked since I hadn’t seen many if any pre-made gluten free pies out there, but then I instantly thought of Thanksgiving, my dad’s favorite pie holiday, where he rolls out at least three huge, mouthwatering (non-gluten free) pies. While I’ve dabbled in gluten free pie making over the years, on a holiday like Thanksgiving where I’m also making a number of other dishes, the cost and time spent make purchasing a pre-made pie more and more appealing. So before Thanksgiving comes around this year, I wanted to give Katz’s gluten free pie a try, but if it’s anything like their other items, I knew my Thanksgiving order would soon follow.   Katz Blueberry Pie (1)  So, Katz offers a couple different varieties of gluten free pie, which also happen to be free of dairy, nut, and soy too, including apple, cherry, and blueberry. I’ve always loved blueberry pies so I figured that would be a good one to try out. Price wise, each of these pies come in a 6″ size that runs about $7.99, but remember Katz offers promotions all of the time so keep an eye out over the coming weeks for a holiday pie deal. If you need something a bit larger than a 6″/personal pie, you can either order two 6″ varieties or they also offer the apple pie in an 8″ size for $12.99. If you want to check out all of Katz Gluten Free’s pie varieties, head over to their cake/pie section on their site.    Katz Blueberry Pie (2)  Once you decide what varieties of pie you’d like to go with, go ahead and order away, but not before you peruse the rest of their site just to be sure that there’s nothing else that you might like to try for the holiday season. Gluten free sprinkle cookies anyone? Once your order is placed, it’ll be no time until it arrives; I always get my orders really quickly from Katz, but keep in mind I am relatively close to them geographically, but nonetheless I’ve always received my orders in a timely fashion. When your pies do arrive, make sure you make room in your freezer to pop these in and save them for Thanksgiving, or at least try to. To enjoy, since these pies are pre-baked, all you have to do is thaw them in the refrigerator and if you’d like, warm them for 15 minutes in the oven, which does add the homemade, pie baking smell to your house that’s very appealing this time of year.

And finally, you’re probably wondering what these pies taste like. Okay, I think I’ve kept you in suspense long enough to tell you that these are DELICIOUS! The blueberry pie filling that I tried wasn’t too sweet but was just right with blueberries scattered throughout, while the crust, well that was just perfection. The gluten free pie crust was crispy and was softened just enough by the filling, but by no stretch did it do the signature crumble apart that so many gluten free products do. Katz’s gluten free pie tasted so homey, just like my dad’s homemade pies but without the gluten. I’m certainly adding these to my holiday shopping list, and I highly suggest that you do too. Let me know what kind you end up getting and what you think! Enjoy!

Note: No pretty pie picture unfortunately because my dear husband promptly dropped the wrapped pie flat on the ground before I even had a chance to bake it, so even though the pie was still edible and delicious just the same, it didn’t look so pretty at that point. There’s always next time. 

Sincerely,

Lindsay


Are You A Blogger Or Thinking About Starting A Blog? The Digital Mom Handbook Will Help You Get There!

After my road to motherhood had been a bit more difficult than we had thought, my husband and I decided that I’d stay home and be with our little one. While I’d gone to school for nearly 7 years and finished with advanced degrees in the sciences, my life had changed so much in the short time since then and so had I. Going through all of the health challenges that I had over the years and then the obstacles with the birth of my little girl, my dream of never leaving our children and raising them on my own had become more and more important to me. I thank God everyday that I’m able to live this life as a stay at home mom, a life that I couldn’t be more happy in.

But even though I stay home with my little girl and go by Mommy now, I still have career goals that just look a little bit different than they once used to. While being mom, I wanted to use the lessons and stories that I have from the obstacles that I’ve faced to help others. As I’ve experienced some rare and difficult situations over the years, the hardest part of each one was feeling alone. I wanted to be there for other people that may be feeling the same way that I once had. Hence this stay at home mommy started blogging. Blogging has been the perfect addition to my life and I can do it while being the mom that I always wanted. However, it’s been by no stretch easy and when I started blogging I had no idea that a resource like The Digital Mom Handbook existed. But now nine months later, I’ve found this fantastic book about blogging, written by mothers just like me. Audrey and Colleen share the importance of balancing being mom and blogging for yourself and your family and I just love this message is nestled within tons of priceless advice about the blogging world. Check out my video blog to learn more about The Digital Mom Handbook!

Blogging has become such a huge piece of my life and I can only dream about what the future holds for me and my family. This book will help guide me on the path ahead and I couldn’t be more grateful for it’s mommy authors, Audrey and Colleen, who have been so gracious to share their experiences and advice to help other mommy bloggers like me!

Sincerely,

Lindsay 


2 Days And Counting Until Trick-Or-Treating, Are You Ready For The Teal Pumpkin Project?

Can you believe we are in the last week of October already? I know, time has just flown by this month, as I think it always does this time of year thanks to the over abundance of things to do. Aside from the unfortunate increase in colds and flus, fall is one of my favorite seasons. From the crisp and cool fall air to the amazing festivals and activities of all kind that seem to surround us. This year, with our little girl being a hundred percent mobile, our annual fall activities of apple picking, going to the pumpkin patch, pumpkin carving/painting, and attending fall festivals here and there looked very different from last year. She just loved each and every one, from picking out her favorite miniature pumpkin/gourd and sitting on top of our big carving pumpkin to picking those little baby apples off the trees and yelling apples while placing them in her bucket. Life has changed so much in only a year, but in so many good ways. 

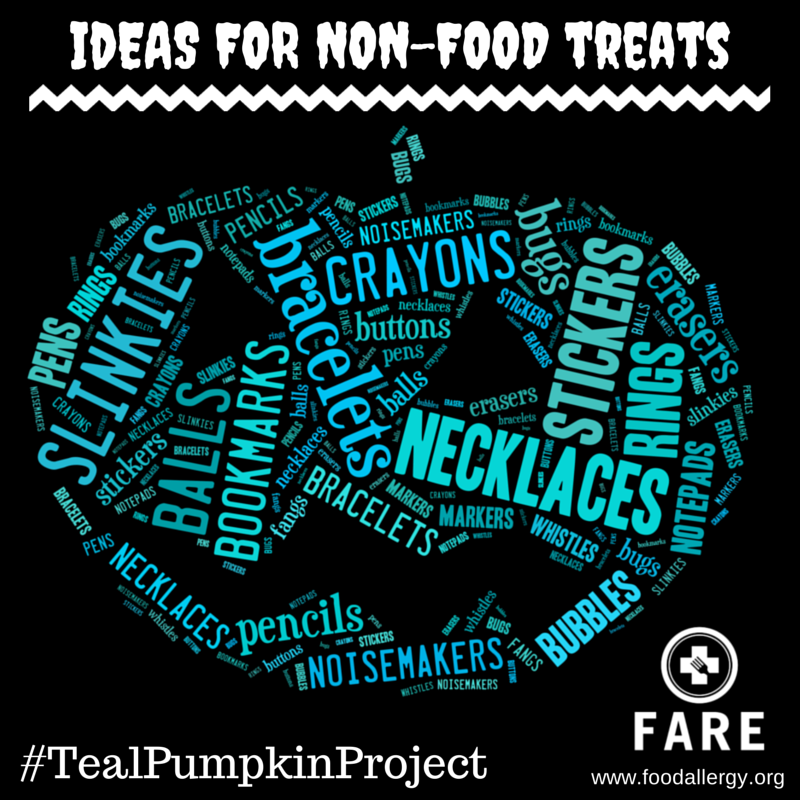
Seeing as we’re only a couple days away from the highlight of October, this week we’re in full Halloween prep mode. This past weekend, our little girl painted her pumpkins while Mommy tried her hand at our first serious pumpkin carving, which for my first time I am very proud, if I do say so myself. Earlier in the week, we ran some errands to scout out some more Teal Pumpkin Project treat ideas and made Pumpkin Chocolate Chip Pancakes for dinner. And today we’re going to take full advantage of the unseasonably warm air that’s rolling in by spending some time outside and maybe making some Halloween shape cookies later on too.  What do you think  So like I mentioned, among our Halloween week travels, little one and I were scouting out a few more ideas for Teal Pumpkin Project friendly treats. Having a food intolerance myself, as well as a nephew with severe food allergies, has changed my view entirely on holidays, especially those that are centralized around food. As a little girl, I remember running from house to house on Halloween, collecting buckets full of candy that my siblings and I would then hold a formal trading session for later on that night. While half of the fun of Halloween is definitely the dressing up and running around part, the other half is easily the candy and treats that you work hard to accumulate. Even though I can’t imagine what my holidays would have looked like as a child if my food intolerance were active at that time, I’ve been able to get a pretty good idea from watching my nephew. Now almost 8 years old, each year he’s been a really good sport about the limitations for him for Halloween. He loves dressing up and trick-or-treating with his brothers and cousins but the candy side of things doesn’t hold much excitement for him. Thankfully, with a ton of family local, ever since he was small we’ve been able to make sure that he gets plenty of edible and non-edible treats that will make his Halloween just as exciting as his siblings. The-Teal-Pumpkin-Project-5 My nephew isn’t the only child with stories like these from Halloween; in fact there’s far more children with food allergies/intolerances than many realize, hence the inspiration for the Teal Pumpkin Project. Through the Teal Pumpkin Project, on Halloween, children with food allergies will feel included but safe at the same time with the ability to trick-or-treat for fun, non-food items. What an amazing and community unifying idea and all you have to do to participate and make these kids smile is paint a pumpkin teal or hang one of these flyers in your window/door and provide a simple, allergy friendly non-food option in addition to or instead of candy.

After perusing the Halloween section at Target and Walmart and getting over the sticker shock of how much candy is now, I figured that many of you probably spend a good $10 dollars at least on bags of candy.  Why not take a few dollars out of what you’re already spending and get a small selection of non-food items to pass out too! These things don’t have to be expensive, in fact they can cost just as much or less than the candy that you normally purchase. Need some ideas? You’re in luck, I’ve got some great ones that are affordable and will fit right in with your candy budget too! Check out some of my recommendations in my vlog, along some more ideas below.

Here’s a whole list of cheap and fun ideas, along with where you might find them.

Target finds:

  • Spider rings (a bag full for $1)
  • Stretchy creatures or skeletons (package for $1)
  • Tattoos ($3 for a container full)
  • Glow in the dark fangs (1 for a bunch)
  • Festive erasers ($1 for a bunch)
  • Halloween bouncy balls ($3 for a package)
  • Halloween shaped crayons or chalk ($2 for a package)
  • A bowl full of crayons ($2.49 for a huge box)
  • Glow bracelets/sticks 

Craft stores like Michael’s or Acmoore and the Dollar Store too has similar finds (Michael’s has 70% off their Halloween stuff already too!):

  • Spooky witch fingers (a bag full for $1.99)
  • Different color rubber bracelets (a bag full for $1)
  • Eyeball rings ($1.99 for a bag)
  • Halloween stickers books ($1, you can always give out a page to each child)
  • Coloring books ($1 each)

Party City has some fun treats too:

  • Multipack of black spiders (99 cents)
  • Pumpkin bookmarks (a bunch for 99 cents)
  • Halloween activity pads (a bunch for 99 cents)
  • Spooky eye patches (a bunch for 99 cents)
  • Eyeball ping pong balls ($1.99 for a package)
  • Halloween whistles ($1.99 for a package)
  • Halloween bubbles ($2.99 for a bunch)
  • Halloween puzzle cubes ($2.99 for a bunch)
  • Halloween eyeball glasses ($3.99 for a multipack)
  • Halloween punch balloons ($5.99 for a big package)

If you do end up purchasing any of these Halloween goodies, keep in mind that they make great little treats for your own little ones too. I could pick out a handful that my nephew who’s 8 would have a kick out of and a ton more that my little girl, who loves everything that’s small and little, would love to cart around with her too. In fact earlier in the season, I bought her a bag of the spider rings just for fun and ever since she puts one on each finger and stuffs the rest in a cup, insisting on carrying it wherever we go and I mean wherever. On our errands the other day, her toy of choice to bring along with us was the cup of goodies that now includes the spider rings, a necklace, and a pair of sunglasses, along with any other small odds and ends, all of which found itself splattered across the craft store floor and an “uh-oh” echoing from within the stroller. No worries, the cup of treasure was retrieved and nestled snugly back in the arms of my little girl, but I think I’ll have to burst her bubble and insist that the cup of treats stays inside when we go our on adventures outside of the house.

So make sure you take advantage of these last few days before Halloween and head out to pick up some of these non-food treats. And don’t forget to hang your Teal Pumpkin Project sign or get your kids involved (or have a little fun yourself) and paint a pumpkin teal, to tell everybody around you that you have some allergy friendly treats! It’s such a fun holiday that we all look back on with fond memories, let’s make sure all of our kids can do the same.

Have a Happy Halloween,

Lindsay 

1 9 10 11 12 13 26