Holidays Done Gluten Free

My Favorite Gluten Free Easter Dishes: Deviled Eggs

After an extremely long winter, Easter is only three short weeks away. This year my husband, daughter, and myself are hosting the holiday and couldn’t be more excited. I always look forward to planning birthday parties, events, and now this upcoming holiday. Hopefully the weather becomes more Springlike by then to allow for the traditional Easter egg hunt for the kiddies, which yay my little one will be old enough join in this year! But until then, I’ll be planning out the menu and trying out different gluten free as well as other allergen free dishes for my poor little nephew who is allergic to practically every food. Along with the coleslaw, we traditionally put out a big plate of deviled eggs, one of my personal favorites and with only a few ingredients I can easily make these gluten free. So for today’s Easter dish, I’m introducing you to a side that I make year round and on holidays, they’re just that delicious!

Recipe makes 1 dozen deviled eggs.

Ingredients:

  • 6 large eggs
  • 2 heaping tbsp light mayonnaise (Hellmann’s is gluten free)
  • 1 full tsp yellow mustard (French’s is gluten free)
  • paprika for dusting tops of eggs (optional)
  • salt for boiling eggs
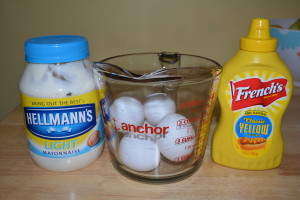
Deviled egg ingredients.


Directions:

  • To a large pot of water, add 6 large eggs and sprinkle salt (this helps egg shells to peel off easily).
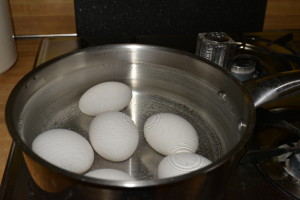
Add eggs to pot of water before you begin to heat.
  • Bring water to a boil and continue to heat at a boil for 10 minutes. 
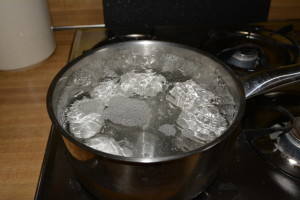
Once water has boiled, allow eggs to continue to be heated for 10 minutes.
  • After 10 minutes at a boil, remove from heat and let stand in hot water for an additional 5 minutes. 
  • Pour off hot water slowly and run cool water over eggs until eggs are cool enough to handle.
  • Tap each egg causing shell to crack and then gently peel shell from egg. This is where the salted water is key, the salt loosens the shell from the egg allowing for easier peeling. Sometimes the shells peel very easily and others they are difficult to remove, either way peeling them under running water helps the process along.
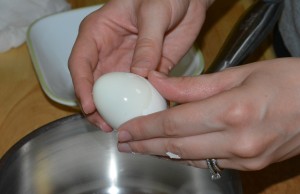
Peel shells gently from eggs.
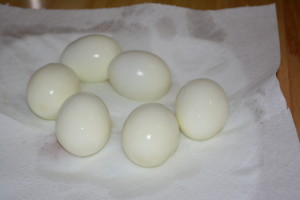
  • After peeling off shells, rinse each and pat dry with a paper towel ensuring all bits of shell have been removed. 
Rinse peeled eggs and pat dry on a paper towel.
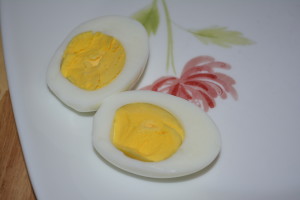
  • Cut each egg vertically to create two halves.
Half each egg vertically.
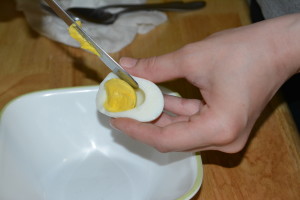
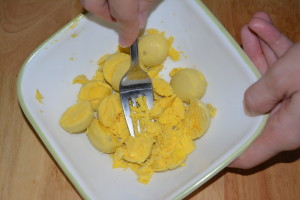
  • Remove yolks from each egg, adding them to a small bowl. These may stick a bit to the egg so try using a teaspoon to gently dig them out.
Gently remove egg yolks, adding them to a small bowl.
Deviled Eggs Blog Pics (9)
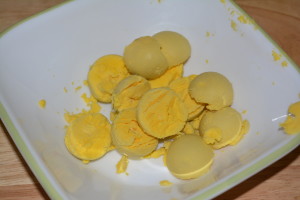
Egg yolks ready to be mashed.
Deviled Eggs Blog Pics (10)
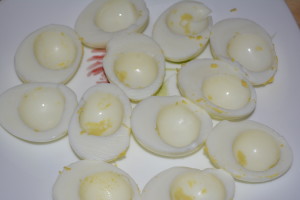
Empty eggs ready for filling.
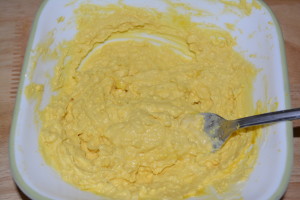
  • Using a fork, push down and loosen yolks until small crumbs form.
Mash egg yolks with a fork.
  • To the crumbled egg yolks, mix in 2 heaping tablespoons of mayonnaise and 1 teaspoon of yellow mustard. Taste mixture, if you’d like you can add a little bit more yellow mustard if you prefer more of a mustard flavor.
Egg yolk mixture ready to be added to the empty eggs.
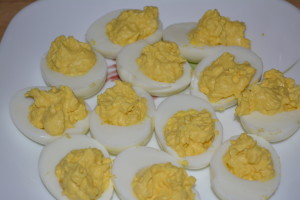
  • Fill empty eggs with egg yolk mixture.
Filled eggs with mayo/mustard mixture.
Filled eggs with egg yolk/mayo/mustard mixture.
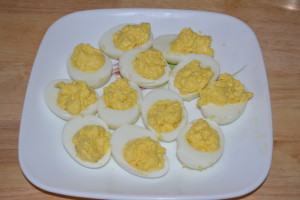
  • Add a sprinkle of paprika to the tops of the eggs or enjoy as is!
To finish you can dust tops with paprika or leave them without.

These deviled eggs are so delicious, you just have to make sure that you make enough! I typically boil up a dozen eggs (double this recipe) to make enough deviled eggs for my entire family on a holiday so just adjust this recipe as needed. An added bonus, deviled eggs are a very easy side dish and use only three ingredients that we keep in our house at all times! So if you’re short on time, want a side dish that won’t break the bank, and best of all will impress all who dine, make these deviled eggs this Easter and you will definitely receive requests to make these every year after!

TIP: If I’m making these for a holiday or special occasion I typically boil up my eggs the night before and just refrigerate them overnight. By prepping the eggs the night before, I only have to put together my deviled eggs the day of and have saved myself a good 20 minutes that I desperately need for many other things. Also, if you’re taking these along with you to someone else’s house, invest in a deviled egg carrier (yes they do exist)! It doesn’t have to be fancy; in fact, I saw a covered carrier at Target in my travels this weekend for only $5. 

Sincerely,

Lindsay

Easter Deviled Eggs
Write a review
Print
Total Time
35 min
Total Time
35 min
Ingredients
  1. 6 large eggs
  2. 2 heaping tbsp light mayonnaise (Hellmann's is gluten free)
  3. 1 full tsp yellow mustard (French's is gluten free)
  4. paprika for dusting tops of eggs (optional)
  5. salt for boiling eggs
Instructions
  1. To a large pot of water, add 6 large eggs and sprinkle salt (this helps egg shells to peel off easily).
  2. Bring water to a boil and continue to heat at a boil for 10 minutes.
  3. After 10 minutes at a boil, remove from heat and let stand in hot water for an additional 5 minutes.
  4. Pour off hot water slowly and run cool water over eggs until eggs are cool enough to handle.
  5. Tap each egg causing shell to crack and then gently peel shell from egg. This is where the salted water is key, the salt loosens the shell from the egg allowing for easier peeling. Sometimes the shells peel very easily and others they are difficult to remove, either way peeling them under running water helps the process along.
  6. After peeling off shells, rinse each and pat dry with a paper towel ensuring all bits of shell have been removed.
  7. Cut each egg vertically to create two halves.
Gluten Free Mom To Be https://www.glutenfreemomtobe.com/

Chocolate, Chocolate, and More Chocolate: Gluten Free Flourless Chocolate Cake

Have you ever had a flourless chocolate cake? If you haven’t, you’re missing out on a little slice of gluten free heaven. Thanks to the missing flour, this dessert by nature is gluten free and has become quite popular in the restaurant circuit. A number of restaurants now offer a flourless chocolate cake as a dessert option, my favorite and where I first tried this divine creation is at Salt Creek Grille.

This sweet treat is best described as a very rich, chocolatey dessert. Depending on where you have tasted it, it can either be very fudgy in texture or resembling more of a lava cake. Either way you taste it, equally delicious! If you like chocolate, this dessert is totally for you and lucky for me I am a chocolate lover. As my husband’s birthday had passed, mine was quickly approaching and this year I had decided to go the chocolate route and indulge a little by making a flourless chocolate cake. After some googling I came upon the perfect recipe from Whole Foods Market for a Flourless Chocolate Cake Topped with a Chocolatey Glaze. After a tweak or two, some shopping, and baking away in my kitchen, my flourless chocolate birthday cake was born and was it ever delicious. This recipe is so simple and easy and the product is truly impressive! So give it a try!   

Ingredients:

  • 12 ounces of semi-sweet chocolate chips or bittersweet chocolate (Hershey’s baking chips are gluten free according to the website)
  • 1 cup plus 3 tbsp unsalted butter sticks (Land O’ Lakes states gluten free)
  • 1 1/4 cup sugar
  • 6 eggs
  • 1 cup unsweetened cocoa powder (I use Hershey’s)
  • 1 tbsp skim milk (can use whole milk if you prefer)
  • 1 tbsp honey (Groeb Farms Pure Honey Clover is gluten free)
  • 1/4 tsp pure vanilla extract (McCormick states gluten free)
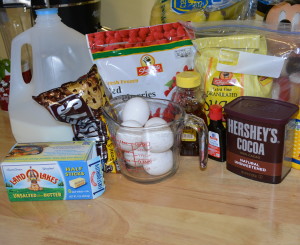
Gluten free flourless chocolate cake ingredients.

Directions:

  • Preheat oven to 375 degrees.
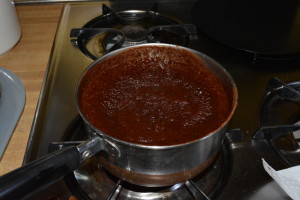
  • Heat 2/3 (8 ounces) of the chocolate and 1 cup of the butter in a saucepan at medium low heat. Stir frequently, preventing chocolate from burning and combining butter and chocolate completely.
Melt chocolate and butter together.
  • Remove melted chocolate from heat and transfer to a large mixing bowl. Add 1 1/4 cup sugar and mix well.
  • Add 6 eggs one at a time, mixing well after each addition.
  • Finally, add 1 cup of unsweetened cocoa powder to chocolate mixture and stir until completely mixed.
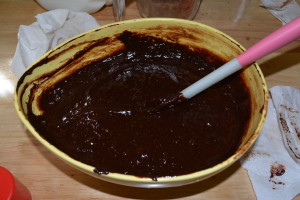
Flourless Chocolate Cake Blog Pics (6)
Flourless chocolate cake batter.
  • Spray 9 inch springform pan with nonstick cooking spray, line bottom with a circle of parchment paper, and spray paper with cooking spray.
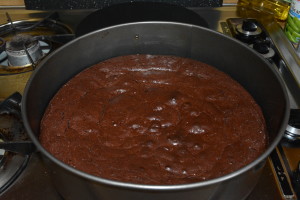
  • Pour batter into prepared pan and bake for 35-40 minutes. Cake is finished when it has risen and formed a thin crust (should be firm in the center).
Bake cake in a 9-inch springform pan.
Bake cake in a 9-inch springform pan until center is firm.
  • Cool cake for 10 minutes and then invert onto a plate, remove sides of springform pan.
  • Allow cake to cool completely (an additional 30 minutes or so).
  • While cake is cooling, prepare the chocolate glaze by melting the remaining 4 ounces of chocolate and 3 tbsp of butter in a saucepan over medium low heat. Stir frequently until all is melted and combined.
  • Once chocolate is smooth, remove from heat and stir in 1 tbsp skim milk, 1 tbsp honey, and 1/4 tsp pure vanilla extract. Set glaze aside to cool slightly (only about 10-15 minutes).
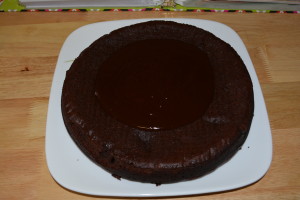
  • Pour glaze on top of the cake.
Drop glaze on top of cooled cake.
Add glaze on top of the cake.
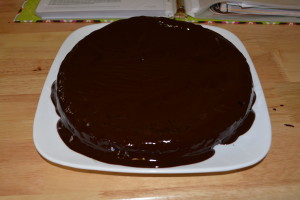
  • Using the back of a spoon, smooth chocolate glaze over the top of the cake, allowing it to spill over the sides.
Push glaze around the cake slowly covering the top and sides.
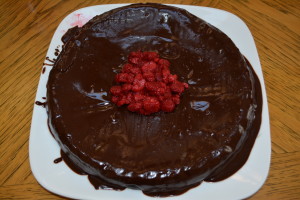
  • Leave cake uncovered for an additional 30-60 minutes for the glaze to set. Then add fresh or frozen berries for serving. I recommend raspberries whose sweetness complement the richness of the cake perfectly. Fresh are preferred but I used frozen which were much cheaper than the fresh.
Leave cake uncovered for about an hour to allow glaze to harden. Top with fresh or frozen fruit (I recommend raspberries) to serve.
Let glaze set and top with fresh or frozen fruit (I recommend raspberries) to serve.

I don’t know about you but when I first even thought of making this dessert my mouth began to water. It turned out perfectly and certainly was a wonderful divergence from my norm of gluten free birthday cupcakes or brownies. My only downside was that I ran short on time and couldn’t try my raspberry sauce that I had planned but no worries topping each slice with some frozen raspberries was a perfect compliment to the richness of the chocolate. Next time though, I will be making a raspberry sauce to drizzle on top which will literally and figuratively be the icing on the cake.

If you’re expecting company, celebrating a special day or holiday, or just craving chocolate than try this recipe. It was so easy and is a truly impressive dessert to make, not only in presentation but also in taste. Tastewise, I always watch my non-gluten free eaters take their first few bites of whatever gluten free dish I prepare. As my opinion, being the only gluten free eater, is slightly bias I like to hear or rather see the reactions of my fellow diners. In this case, as each of my family members tried a slice of my flourless chocolate cake and immediately after taking their first bite drew a smile, I knew for sure that this recipe was a success and will most certainly be repeated on another special occasion for all to enjoy!

Enjoy!

Sincerely,

Lindsay


Gluten Free Flourless Chocolate Cake Topped with a Chocolatey Glaze
Serves 12
Write a review
Print
Ingredients
  1. 9 inch springform pan
  2. 12 ounces of semi-sweet chocolate chips or bittersweet chocolate (Hershey's baking chips are gluten free according to the website)
  3. 1 cup plus 3 tbsp unsalted butter sticks (Land O' Lakes states gluten free)
  4. 1 1/4 cup sugar
  5. 6 eggs
  6. 1 cup unsweetened cocoa powder (I use Hershey's which states gluten free on website)
  7. 1 tbsp skim milk (can use whole milk if you prefer)
  8. 1 tbsp honey (Groeb Farms Pure Honey Clover is gluten free)
  9. 1/4 tsp pure vanilla extract (McCormick states gluten free)
Instructions
  1. Preheat oven to 375 degrees.
  2. Heat 2/3 (8 ounces) of the chocolate and 1 cup of the butter in a saucepan at medium low heat. Stir frequently, preventing chocolate from burning and combining butter and chocolate completely.
  3. Remove melted chocolate from heat and transfer to a large mixing bowl. Add 1 1/4 cup sugar and mix well.
  4. Add 6 eggs one at a time, mixing well after each addition.
  5. Finally, add 1 cup of unsweetened cocoa powder to chocolate mixture and stir until completely mixed.
  6. Spray 9 inch springform pan with nonstick cooking spray, line bottom with a circle of parchment paper, and spray paper with cooking spray.
  7. Pour batter into prepared pan and bake for 35-40 minutes. Cake is finished when it has risen and formed a thin crust (should be firm in the center).
  8. Cool cake for 10 minutes and then invert onto a plate, remove sides of springform pan.
  9. Allow cake to cool completely (an additional 30 minutes or so).
  10. While cake is cooling, prepare the chocolate glaze by melting the remaining 4 ounces of chocolate and 3 tbsp of butter in a saucepan over medium low heat. Stir frequently until all is melted and combined.
  11. Once chocolate is smooth, remove from heat and stir in 1 tbsp skim milk, 1 tbsp honey, and 1/4 tsp pure vanilla extract. Set glaze aside to cool slightly (only about 10-15 minutes).
  12. Pour glaze on top of the cake..
  13. Using the back of a spoon, smooth chocolate glaze over the top of the cake, allowing it to spill over the sides.
  14. Leave cake uncovered for an additional 30-60 minutes for the glaze to set. Then add fresh or frozen berries for serving. I recommend raspberries whose sweetness complement the richness of the cake perfectly. Fresh are preferred but I used frozen which were much cheaper than the fresh.
Adapted from Whole Foods Market
Gluten Free Mom To Be https://www.glutenfreemomtobe.com/


My Favorite Gluten Free Easter Dishes: Coleslaw

So many of my childhood memories are formed around meals, family dinners, holidays, birthdays, everything surrounding food. One of my favorite holidays next to Christmas is Easter, the fresh scent of spring, blossoming tulips everywhere, birds chirping, beautiful hymns being sung in church, Easter eggs scattered around the yard, candy overflowing out of our Easter baskets, all wrapped up with a huge family dinner. I’ll never forget the sights and smells of each of our traditional Easter dishes. One of my all time favorites is my grandmother’s coleslaw. This dish is so far from the cafeteria or store bought coleslaw, trust me. Quite opposite of the stringy, crunchy texture of the side slapped on your plate at most restaurants, this coleslaw is perfectly smooth and creamy with just the right balance of mayo and sour cream.

My first Easter gluten free I was so nervous about what my new Easter dinner might look like. Along with some of own gluten free dishes, I volunteered to take on the family favorite coleslaw and do it gluten free. After some quick instructions from my grandmother I realized it could easily be gluten free, as long as the right brands of ingredients were chosen. After some research and a quick trip to the store I prepared my very first gluten free coleslaw courtesy of my grandmother’s recipe. Judging by the empty bowl and cleaned plates at the end of the holiday, along with a compliment from my grandmother I’d say the coleslaw was a success. Several years since and I’m still providing our Easter coleslaw but done gluten free. I’m so excited to share our family tradition with you and hope it adds a little something extra to your gluten free holiday!

Ingredients;

  • Food Processor (for fine chopping of cabbage)
  • Small Head of Cabbage
  • Paprika
  • 1 1/3 cup Hellmann’s Mayonnaise (either regular or light, both are marked gluten free)
  • 2/3 cup Light Sour Cream (check the label and call the company of whichever brand you choose unless it states gluten free explicitly on the label)
  • Water for cabbage while mixing
  • Salt to taste
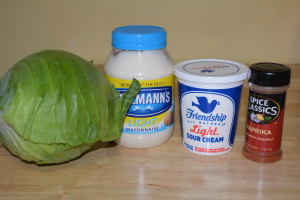
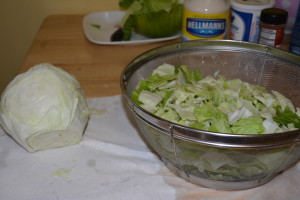
Easter Coleslaw Blog Pics (1)
Ingredients for gluten free coleslaw.


Directions:

  • Remove outer leaf and quarter head of cabbage down to the core (discard the core).
  • Chop cabbage into smaller pieces and wash thoroughly.
Easter Coleslaw Blog Pics (2)
Chop up cabbage leaves until core is reached.
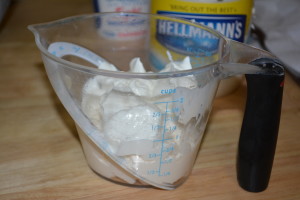
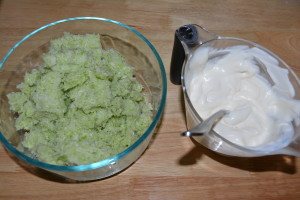
  • Mix mayonnaise and sour cream together. Taste mixture, making sure there is a good balance between mayonnaise and sour cream. You may need to prepare more of this mixture later depending on the size of the cabbage.
Mixture of mayonnaise and sour cream.
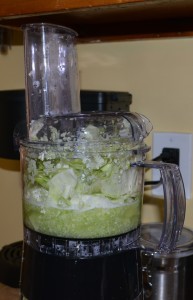
  • To food processor, add chopped cabbage and a little bit of water.
Add chopped cabbage and water to food processor.
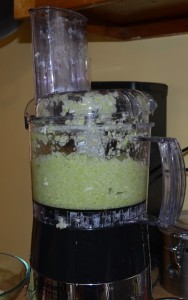
  • Process the cabbage in the water until finely chopped and add to an empty bowl.
Process cabbage until it is finely ground.
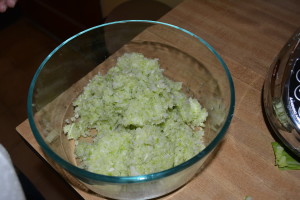
  • Once all cabbage is processed, begin to remove the water from the cabbage. I do this using my hands by simply taking a handful and squeezing the water out. It’s a bit messy doing it this way but quick. Alternatively, you can add the cabbage to an extremely fine strainer layered with a paper towel and let it strain slowly or press with a spoon to help the water come out. Once water is removed, add strained cabbage to a bowl.
Squeeze water out of cabbage and add to bowl.
  • Add mayonnaise/sour cream mixture to cabbage and combine completely.
Mix cabbage and mayonnaise and sour cream mixture until thoroughly combined.
Mix cabbage and mayonnaise/sour cream mixture until thoroughly combined.
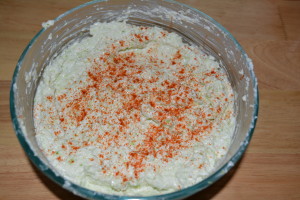
  • Finally, taste coleslaw and salt if desired. At this point I’ve tasted so many times I usually bring my husband in as the designated coleslaw taster. Feel free to make any little tweaks to the overall taste, i.e. if the coleslaw has too strong of a mayo taste add a bit more sour cream to balance it out. To finish, top with paprika.
Taste mixed cabbage and salt to taste. Dust top with paprika to finish.
Taste coleslaw and add salt if needed.

Thanks to my grandmother who has passed down a wonderful recipe to my family! Try this one out for your gluten free Easter meal this year and all of your diners will definitely enjoy!

Sincerely,

Lindsay


1 2